Friday, July 30, 2010

Fluffy Pancakes

Ok, so I know we have a ton of pancake recipes on the blog. But, we make a ton of pancakes and waffles in our house so we are always on the lookout for great recipes. When I need a recipe for a specific item, like bread, cookies, or pancakes, I always go to allrecipes, type in the item, and search for the highest rated one. And, this is what I came across when looking for the best pancakes. This recipe was given 5 stars by 915 people!! So, you know they're going to be good. And, the best part is that they are very easy and have really common ingredients. These are our new favorite pancakes...enjoy!
picture courtesy AllRecipes.com

Fluffy Pancakes
Adapted slightly from Allrecipes.com

3/4 cup milk
2 tablespoons white vinegar
1 cup all-purpose flour
2 tablespoons white sugar
1 teaspoon baking powder
1/2 teaspoon baking soda
1/2 teaspoon salt
1 egg
2 tablespoons butter, melted
1/2 tsp. vanilla
cooking spray

Combine milk with vinegar in a small bowl and set aside for 5 minutes to "sour".
Combine flour, sugar, baking powder, baking soda, and salt in a large mixing bowl. Whisk egg and butter into "soured" milk. Pour vanilla into the dry ingredients- don't mix. Pour the wet mixture into the flour ingredients and whisk until lumps are gone. Heat a large skillet over medium heat, and coat with cooking spray. Pour 1/4 cupfuls of batter onto the skillet, and cook until bubbles appear on the surface. Flip with a spatula, and cook until browned on the other side.

Thursday, July 29, 2010

Mozzerella and Tomatoes


*Photo Courtesy of Tasty Sensations

Baking is my nemesis.  I cannot figure it out and I have tried.  A lot.  Well...these actually turned out and were a hit!  There's something about buttermilk that just makes things better!

Buttermilk Rolls.

Recipe from Tasty Sensations Blog 


3 cups Buttermilk (room temperature)*
3 cups flour
1 T. yeast dissolved in ¼ cup warm water (first let rise a few minutes)
½ cup sugar
3 eggs, beaten with a fork
2 tsp salt
6 cups flour (sometimes you need a cup or two more--it should not be too sticky)
½ cup oil
1 tsp baking soda

Dissolve yeast in ¼ c. warm water and let proof a few minutes. Mix the buttermilk, 3 cups flour and yeast together thoroughly in a large mixing bowl. Let this stand at room temperature until double in size, about 2 hours.

Add sugar, eggs, salt, 5 cups flour, oil, and baking soda. Mix well and kneed for 7-10 minutes. Roll out what you want and place the rest in the refrigerator, covered. I rolled mine out, cut them with a pizza cutter, and put them in a glass pie plate.  Anyway, the next time you want some fresh baked rolls, take from the bowl what you want and again put the rest back in the refrigerator. It will keep for 7 days. (This is perfect for Sunday meals because you don’t have a lot of mess to clean up and it’s quick.)

Let rolls rise on baking sheets until double in size. Time depends on the room temperature, usually 1½ - 2 hours. Dough from the refrigerator will take longer because the dough is cold.

Bake at 350° for 10-12 minutes. Brush with melted butter if you like.

Makes 2 dozen large rolls.

Chocolate Covered Blueberries

Chocolate-Covered Blueberries

What You Need:
• 2 cups blueberries
• 1 cup semi-sweet chocolate chips (I will do milk chocolate when I make these again)
• 1 Tbsp. butter or shortening

First, wash your blueberries and lay them out on paper towels to dry completely (the chocolate won't stick to them properly if they are wet) and let them sit for a while to warm to room temperature, if needed. Cold berries will adversely affect the chocolate, so making sure they are room temperature is very important! Then put them into a large bowl.

Next, using a double-boiler or your microwave (we have done it both ways successfully), melt your chocolate chips and butter together until smooth. Then pour it over your blueberries. Gently mix them until they are all pretty well coated. Drop small spoonfuls of the chocolaty berries onto a cookie sheet covered in wax paper.
Put your cookie sheets into the fridge and let them get good and cold. Then it's time to eat and enjoy! They may not be pretty but they are delish!

Wednesday, July 28, 2010

Chocolate/Pumpkin Chippy Muffins

*Photo courtesy of That's So Cuegly blog
A fantastically delicious weight watchers recipe.  These little suckers are deviously delicious.  Why not freeze them individually and eat one a day?  Yeah, I think that sounds like a fabulous idea.


Chocolate/Pumpkin Chippy Muffins
Recipe from That's So Cuegly blog
These are
1:The most moist delicious things you'll ever eat
2: Fat Free
3: A Weight Watchers Recipe

Directions: Mix together a Devil's Food Cake Mix, I small can Pumpkin, 2/3 c. Water, and a half bag of Mini-Semi-Sweet Choc Chips.
Makes 24 cupcakes, fill 2/3 full and follow the directions on your box for Cupcakes.

Tuesday, July 27, 2010

Wonton Chicken Salad

This salad is always a crowd-pleaser!

Wonton Chicken Salad

1 head of lettuce
2-3 chicken breasts, cooked, cooled, pulled apart
3 green onions, diced
1/4 cup sesame seeds, browned without oil
1/2 package wonton dough, cut into thin strips and fried in oil (on medium low heat)
1 large can mandarin oranges

Combine all ingredients above.

Dressing:
1/4 cup white vinegar
1/4 cup white sugar
1 tsp. salt
pepper to taste
1/2 cup canola oil (add last)

Mix and pour on salad as desired.

Monday, July 26, 2010

Guacamole!

So, here I am sitting on a hotel bed in the middle of nowhere, north-central Washington state, with my laptop out, posting about food. Isn't technology great? I've been home visiting family in Washington state for the last week or so and am currently out on a rock-hounding trip. Being a geologist, I love driving around checking out the rocks in new places... and, of course, bringing some home with me! There aren't a lot of rocks to be had in Florida, so I've been going through a rock-hounding withdrawal.

Tonight we're in Okanogan. Today was a lovely drive, punctuated by a few stops to do some antiquing, eating, and rock hounding. At one stop, I came across a herd of big horn sheep. There were about twelve of the buggers; I've never seen so many in real life before! I picked up some nice rocks too, so all is right in the world.

Unfortunately, the food scene today was only so-so. We had a nice lunch in Cle Elum, but we made the mistake of not going to dinner early enough here in Okanogan. Apparently, the world shuts up early here. Even driving to Omak didn't produce many more options... so, here I sit fondly reminiscing about this past Saturday night's meal.

My brother and his family came to dinner at my mom's, and I made some guacamole. This recipe is more or less pilfered from an authentic Mexican (versus Tex-Mex) restaurant down in Florida my husband and I have been going to. Easy to make and absolutely delicious, I recommend trying it even if you've never really cared for guacamole before. That was me, by the way, up until a month ago.

Here's the cast... a whole bunch of super fresh, tasty ingredients.

Be sure to choose some nice, large Haas avocados for this recipe. They're ripe when they are soft and the skin has turned evenly dark. Run your knife around the outside and twist to pull apart. The giant seed in the middle is nearly impossible to pull out unless you know the trick. Tap your knife into the seed until it is gently stuck and twist; the seed will twist out perfectly!

Just use a spoon to scoop between the skin and the flesh. Look how nice and green and creamy this avocado is! You don't need to cut the avocado, when it gets into the bowl, you can simply use a fork to mash the ingredients together.

Make sure to add the lime juice right away. Avocados oxidize really, really fast and look super unappealing when they're all brown and nasty. The lime juice not only adds great flavor but keeps things nice and green.

Mince the garlic, sprinkle the salt onto the garlic, and then use the edge of your knife to smear the salt and garlic together, forming a paste. Making a paste of the garlic allows the flavor to more evenly permeate the guacamole. Add the remaining ingredients and mash and stir it all together. While you can store this, covered, in the refrigerator for a few days, I like it best right away, at room temperature; I believe this provides the best texture and flavor.

Guacamole!
Yield: approximately 3 cups

2 large, ripe Haas avocados
1 lime
1 large clove garlic
1/4 tsp (or to taste) salt
1/3 cup seeded, diced tomato
1/3 cup diced red onion
2 TBS chopped fresh cilantro

Cut the avocado in half, remove the seed, and scoop the flesh from the skin into a medium bowl. Juice the lime and pour over the avocado. Mince the garlic and then add the salt to the minced garlic while it is still on the cutting board. Using the edge of your knife, smear the garlic and salt together to form a paste. Add the garlic paste and remaining ingredients to the bowl with the avocados and lime and mash and stir until everything is evenly mixed. Serve immediately, at room temperature. Guacamole will keep, covered, in the refrigerator for a few days, but tastes best if used immediately.

Pat's Baked Beans

Pic courtesy of allrecipes.com

I LOVE baked beans- love, love, love 'em. I'm not talking about the open and pour canned ones, but the real, homemade ones. They are my favorite thing about BBQ's. So, when we were invited to Christian's work BBQ for Pioneer Day last weekend, I decided I'd try and whip up a batch to bring. I went to my go-to place for basic recipes like this: allrecipes.com and found the highest and most-rated recipe for baked beans. Let me just tell ya, if you want a way to make perfectly healthy beans into a nice, gooey, sweet, and tangy confection, you must try these at your next BBQ.

Pat's Baked Beans
adapted from allrecipes.com

  • 8 slices bacon
  • 1 cup chopped onion
  • 2 cloves garlic, minced
  • 2 (16 ounce) cans pinto beans
  • 1 (16 ounce) cans great Northern beans, drained
  • 1 (16 ounce) can baked beans
  • 1 (16 ounce) can red kidney beans, drained
  • 3/4 cup ketchup
  • 1/4 cup molasses
  • 1/3 cup packed dark brown sugar
  • 2 tablespoons Worcestershire sauce
  • 1 tablespoon yellow mustard
  • 1/2 teaspoon pepper

  1. Preheat oven to 375 degrees F (190 degrees C).
  2. Place bacon in a large, deep skillet. Cook over medium high heat until evenly brown. Drain, reserving 2 tablespoons of drippings, crumble and set aside in a large bowl. Cook the onion and garlic in the reserved drippings until onion is tender; drain excess grease and transfer to the bowl with the bacon.
  3. To the bacon and onions add pinto beans, northern beans, baked beans, and kidney beans. Stir in ketchup, molasses, brown sugar, Worcestershire sauce, mustard and black pepper. Mix well and transfer to a 9x12 inch casserole dish.
  4. Cover and bake in preheated oven for 1 hour.

Friday, July 23, 2010

Beef Jerky

I honestly just don't know what's wrong with me! Twenty something days since my last post... you know why? Because I just haven't felt like cooking. .:GASP:. Say it ain't so!! Really. I've done very little cooking since July came around. The few times I have put something together, it very often is something I have already posted. The good thing is that means what I have posted so far are things that I think are good enough to make over and over.

I'm not sure what is to blame for this lack of kitchen-ness, but I suspect it might have something to do with our recent attempts to tame the jungle in our back yard. Most days, I can only make it out there for 2-3 hours, lest I kill myself from heat stroke. I don't know what my problem is... I mean, it's only been 117 degrees with the heat index lately. Fortunately, the yard is really starting to look like something. Anyway. I'm really not sure what has caused my recent reluctance to cook, but I'm sure it will go away soon. It better!

One thing that I did make recently, mainly because I saw London broil on sale at the market, was beef jerky. Homemade jerky is really nice because you get to determine the seasonings and how much salt you want to use. While some salt is really required if you want your jerky to have any staying power at all, it doesn't have to make your tongue burn!

I think London broil is really a good choice for making jerky. There are other cuts you can use such as flank or skirt steak, but London broil is so easy to cut into nice strips and it isn't overly fatty. This is a good thing because too much fat means your jerky can turn rancid on you pretty quickly.

I slice mine about 3/8 of an inch thick. You can partially freeze the meat to facilitate cutting even strips, but I find as long as my knife is sharp, I can do a good job with thawed meat. Cut the meat across the grain, unless you really like to chew and chew... and chew.

Marinate the meat in a seasoning mixture. I like to use soy sauce as my base, but you could use teriyaki or even just use spices alone. You can experiment with spice blends, but my favorite is Chef Paul Prudhome's Meat Magic. It has a slight smokiness and blend of spices that I think is great in a jerky. Set the meat aside, covered, for about an hour.

Lay the strips out on the racks of a dehydrator leaving plenty of space between each slice. You can do this in an oven, but I find the results are less than spectacular. I think the reasons are two-fold: the lowest temperatures available in most ovens are not low enough and there isn't as much air flow.

If you don't already have a dehydrator and are in the market to get one, I strongly advise getting one that provides some temperature control. Depending on what you are dehydrating, you'll want to use different temperature settings. To dry meats, you want a temperature somewhere between 150 and 170 degrees, but most herbs want a more delicate temperature of less than 100 degrees.


Beef Jerky
Yield: approximately 3/4 lb of jerky

2 lbs London broil, trimmed of fat and sliced across the grain 3/8 inch thick
1/3 cup soy sauce
1 TBS Chef Paul Prudhome's Meat Magic seasoning blend (or any other you prefer)
1/4 tsp cracked black pepper

Marinate meat strips in the soy sauce and seasoning, covered, at room temperature for one hour. Place, spaced out, in a single thickness on the trays of a dehydrator. Dry at approximately 165 degrees for 4-6 hours. The time it takes will vary depending on the meat and the climate. Be careful not to over dry or the meat will end up very hard to eat. When you take it out of the dehydrator it will be somewhat inflexible. Place in an airtight container immediately to store. Jerky will soften somewhat once cooled and be easier to eat than when fresh off the dehyrator tray.

The Perfect Sunday Pot Roast

There are as many ways to cook a roast as there are roasts. But, this one is the very BEST I've tried. The thyme and rosemary give it an earthy, fresh, and perfect flavor. The meat is so tender and it could not be easier to make. Pioneer Woman even cooked this recipe when she was invited to Good Morning America- if that isn't a testament to its ease and deliciousness, then I don't know what is.
Picture courtesy Pioneer Woman Cooks
Perfect Sunday Pot Roast
Pioneer Woman Cooks

1 whole (4 To 5 Pounds) Chuck Roast
2 Tablespoons Olive Oil
2 whole Onions
6 whole Carrots (Up To 8 Carrots)
Salt To Taste
Pepper To Taste
1 cup Beef Broth
2 cups To 3 Cups Beef Stock
3 sprigs Fresh Thyme, or more to taste
3 sprigs Fresh Rosemary, or more to taste

First and foremost, choose a nicely marbled piece of meat. This will enhance the flavor of your pot roast like nothing else. Generously salt and pepper your chuck roast. Heat a large pot or Dutch oven over medium-high heat. Then add 2 to 3 tablespoons of olive oil (or you can do a butter/olive oil split). Cut two onions in half and cut 6 to 8 carrots into 2-inch slices (you can peel them, but you don’t have to). When the oil in the pot is very hot (but not smoking), add in the halved onions, browning them on one side and then the other. Remove the onions to a plate. Throw the carrots into the same very hot pan and toss them around a bit until slightly browned, about a minute or so. If needed, add a bit more olive oil to the very hot pan. Place the meat in the pan and sear it for about a minute on all sides until it is nice and brown all over. Remove the roast to a plate. With the burner still on high, use beef broth (about 1 cup) to deglaze the pan, scraping the bottom with a whisk to get all of that wonderful flavor up. When the bottom of the pan is sufficiently deglazed, place the roast back into the pan and add enough beef stock to cover the meat halfway (about 2 to 3 cups). Add in the onion and the carrots, as well as 3 or 4 sprigs of fresh rosemary and about 3 sprigs of fresh thyme.

Put the lid on, then roast in a 275F oven for 3 hours (for a 3-pound roast). For a 4 to 5-pound roast, plan on 4 hours.

Thursday, July 22, 2010

Hashbrown Quiche


*Photo courtesy of Our Family Treat blog

A fun new twist on the typical quiche.  These are also really easy to freeze and eat for a quick breakfast later.

Hash-brown Quiche 

From Our Family Treat Blog

Makes  9-12 quiches

Ingredients:
1 Bag of frozen hash-browns
4 tblsps butter
5 eggs beaten
1/2 cup milk
1/4 cup chopped green onion
1 cup cooked ham, or bacon chopped
1/4 tsp salt
1/4 pepper
2 cups cheddar cheese

Preheat your oven to 400, and butter all the rounds in a muffin tin very well or they will stick .  In the bottom of the tin, and around the side pack in some of the frozen hash-browns. You will want to fill up the bottom about 1/4 of the way, and build up the edges as well.  Put in the oven for about 10 min  or until the hash-browns become golden in color.

In a bowl, beat together the eggs milk, salt and pepper.  Add the chopped ham and onion.  Pour  the egg mixture into the cups over the hash-brown until about 3/4 of the way filled.  Top off the cups with the cheese, and put back into the oven reducing the heat to about 350 and cook for 15 minutes or so.  Check the eggs and once firm you can remove from the oven.  Remove from the tin and serve with your favorite breakfast condiment. 

Wednesday, July 21, 2010

Chicken Enchiladas with Roasted Tomatillo Salsa

Pic courtesy of The Sisters Cafe

Ok, I'll admit, I am obsessed with enchiladas. How could I not be, though,with all that meaty, cheesy, gooey goodness? Well, I have kind of been on a search for the best enchiladas and I have narrowed it down to three (all of which can be found here at Peachtree Cooking). I think, though, that this recipe might just take first now. They are really THAT good. I must give a small warning, though. This is not a 30-minute meal- it's quite an intense little recipe, but I promise you that it will be worth it. Mmmmm, I'm salivating just thinking about these babies!

Chicken Enchiladas with Roasted Tomatillo Salsa
adapted from The Sister's Cafe

Roasted Tomatillo Chile Salsa:
1 pound tomatillos, husked
1 white onion, peeled, sliced, quartered or whole
4 garlic cloves, peeled
2 jalapenos, seeded (or leave the seeds in for some extra heat)
2 teaspoons ground cumin
1 teaspoon salt
1/2 cup chopped cilantro leaves
1/2 lime, juiced

Enchiladas:
Extra-virgin olive oil
1/2 medium onion, diced
3 garlic cloves, chopped
1 1/2 teaspoon ground cumin
1/4 cup all-purpose flour
2 cups chicken stock, storebought (I used bouillon)
Chopped cilantro leaves
1 deli roasted chicken (about 3 pounds), boned, meat shredded - I used chicken breasts
Salt and freshly ground black pepper
20+ taco-sized flour tortillas (depending on how frugal you are with the filling, I squeezed about 22 out)
1/2 pound Monterey Jack cheese, shredded
1 cup sour cream (plus extra for serving)
Chopped tomatoes and cilantro leaves, optional- for garnish
Guacamole, optional

Directions:
Preheat oven to 400 degrees F.
On a baking tray, roast tomatillos, onion, garlic and jalapenos for 12 to 15 minutes. Transfer the roasted vegetables and any juices on the bottom of the tray to a food processor. Add the cumin, salt and cilantro and pulse mixture until well combined but still chunky.

Meanwhile heat a 2 count of olive oil in a medium saucepan over medium heat. Add the onion and cook until soft and caramelized - this should take 5 to 7 minutes. Add the garlic and cumin then cook for a further minute. Sprinkle on the flour and stir to ensure the flour doesn't burn then gradually add the chicken stock to make a veloute. Continue stirring over a low simmer until the flour cooks and the liquid thickens. Turn off the heat, add half of the roasted tomatillo chile salsa, some additional fresh chopped cilantro and fold in the shredded chicken meat and 1 cup of sour cream. Season, to taste, with salt and pepper.

Change the temperature of the oven to 350 degrees F and begin assembling the dish. Take a large baking dish and smear the bottom with some of the reserved tomatillo salsa. Now take the flour tortillas and briefly flash them over the stove-top flame (or put them briefly under the broiler if using an electric stove). (I just microwaved my tortillas for a second - the point is to make them soft and pliable.) Put a scoop of the shredded chicken-enchilada mix on top of the tortilla followed by a sprinkle of the shredded cheese. Fold the tortilla over the filling and roll up. Place the tortillas in the baking dish and continue to do the same with all the tortillas. Finally pour over some more of the salsa and top with the remaining shredded cheese. Bake uncovered for about 30 minutes until bubbly and cracked on top. Garnish with cilantro and tomato.

Serve hot with the remaining tomatillo salsa, sour cream, and fresh guacamole, if desired.

Sunday, July 18, 2010

Yaki Tacos

*Photo courtesy of Just Another Day In Paradise blog
A-MAZ-ING!  You've got to try this refreshing and new take on a taco.  They were delicious!

Yaki Tacos
From Just Another Day In Paradise Blog

Teriyaki Sauce (best sauce EVER)

1 3/4 cups water
1 T cornstarch
3/4 cup brown sugar
1/2 cup soy sauce
1/2 cup canned pineapple chunks (sliced into quarters...I know it sounds lame but just do it)
1/4 cup juice from can of pineapple
1/2 t garlic powder
1/4 t onion powder
2 t minced fresh ginger ( I use the equivalent of ground, I am not fancy)


2-3 chicken breast, cut up into bit size pieces
12 flour tortillas
2 cups shredded monterey jack cheese
4 cups iceberg lettuce, shredded (eyeball it)
1 1/2 cups canned pineapple chunks (again in quarters)
1 1/2 cupped tomatoes, diced (not pictured, we just didn't have them)
1/2 cup chopped green onion

Make teriyaki sauce by whisking cornstarch into water in med saucepan. Add remaining ingredients, then bring to boil. Reduce heat and simmer for 7-10 minutes. Let sauce cool before using for marinating.

After it is cool, measure out 1 cup and set aside. Use the remaining to pour over chicken. Cover chicken and let marinate for at least six hours....if you are thinking ahead overnight is best.

When chicken is done marinating, slightly oil a large skillet over medium/low heat. Remove chicken from sauce and saute in the pan for 8-10 minutes until browned on both sides (toss out rest of marinate). Microwave leftover sauce until it is hot. Pour sauce over the cooked chicken.

To build tacos, preheat another skillet and warm one side then flip over and put 2-3 T of cheese in the middle and let it stay in until cheese starts melting. Remove and then put 3-4 chicken pieces on, then layer lettuce, tomato, pineapple and green onions, not to mention a little bit of sauce.

Friday, July 16, 2010

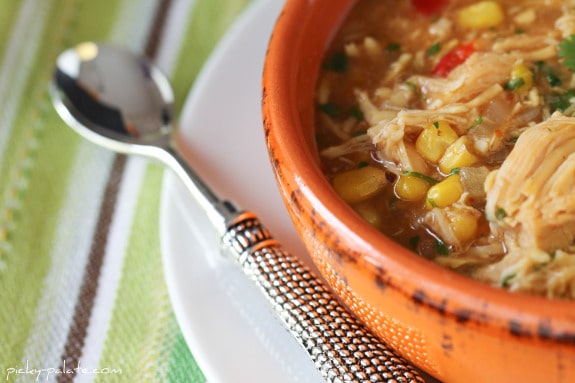
BBQ Chicken Pizza Soup

*Photo Courtesty of Picky Palate

My soup sunday contribution!  This is such a man meal.  All of the men at soup sunday loved this soup.  Best part about it--Took no more than 10 minutes!  This is because you use canned chicken which is really expensive so I probably wouldn't do that again. 

BBQ Chicken Pizza Soup
Recipe from Picky Palate blog

2 Tablespoons extra virgin olive oil

1 medium onion, finely chopped

2 Tablespoons fresh minced garlic

11 oz can corn with peppers, drained

2 12 oz cans Swanson’s Chicken, drained

1 1/2 Cups Chicken Broth

1/2 Cup BBQ Sauce

1/2 teaspoon kosher salt

1/4 teaspoon fresh cracked black pepper

1/4 teaspoon Lawry’s Garlic Salt

1/2 Cup fresh cilantro leaves, chopped

1. Heat oil into a medium pot over medium heat. When hot, saute onions for 5 minutes or until softened. Stir in garlic, corn and chicken breast; mix to combine. Pour in chicken broth, BBQ sauce, salt, pepper, garlic salt and cilantro leaves. Reduce heat to low and simmer for 5 minutes or until ready to serve. Garnish each bowl with a fresh sprig of cilantro.

4-6 servings
*Seriously, I doubled the recipe and added Great Northern Beans and it still didn't seem like much!

Wednesday, July 14, 2010

Chicken and Pasta with Roasted Garlic, White Cheddar, and Broccoli

Pic courtesy of Annie's Eats

I made this dish last night and wanted to post it right away for all it's yumminess! It was just a little twist on other pasta dishes that I've made in the past and it paid off- we all loved it. I know roasting the garlic sounds hard and tedious, but, really, it's worth it. And, it really is easy. You literally just squeeze the garlic out of their "shells" once it's been baked. It's packed with delicious garlic flavor and pretty good for your waistline too!

Chicken and Pasta with Roasted Garlic, White Cheddar & Broccoli
adapted from Annie's Eats

Ingredients:
8 oz. tube shaped pasta, such as penne or rotini
1½ tbsp. butter
¼ cup roasted garlic paste*
1½ tbsp. flour
1 1/4 cup low-sodium chicken broth
1 cup shredded white cheddar cheese (or regular cheddar works fine as well)
1 head of broccoli, cut into florets and blanched until crisp-tender
1 boneless, skinless chicken breast, grilled and cut into bite size pieces
Salt and pepper, to taste

*To make roasted garlic paste, peel the outer papery skins off two heads of garlic, leaving the heads still intact. Slice about a quarter off the top of each head so that all of the cloves are partly exposed. Wrap the heads in foil and bake at 350˚ F for one hour. Remove from the oven and let cool. Once cool enough to touch, squeeze the garlic cloves out of the peels and smash with a fork to make roasted garlic paste.

Directions:
Bring a large pot of salted water to boil. Cook the pasta until al dente according to the package directions.

Meanwhile, in a large skillet or saucepan set over medium heat, melt the butter. Once the butter is melted, whisk in the roasted garlic paste and cook just until fragrant, 30-60 seconds. Whisk the flour into the mixture and cook, stirring constantly, until the mixture begins to turn golden brown, 1-2 minutes. Stir the broth into the pan. Bring to a simmer and cook, stirring frequently, until slightly thickened, about 2 minutes. Whisk in the cheddar and stir until melted. Season the sauce with salt and pepper to taste.

Mix in the broccoli florets and chicken pieces, and cook just until heated through. Mix in the cooked pasta until evenly coated with the sauce. Serve warm.


Tuesday, July 13, 2010

Pita Pizza

picture from google images

I got this idea from the some of the girls at the pool this summer. It is really simple and very quick to put together. You can specialize these pizza's for the individuals in your family. It is a great lunch idea too.

Pita Pizza

Pita (white or whole wheat)
pizza sauce
mozzarella cheese
pizza toppings

Heat oven to 400 degrees. Take pita out of package and layer with pizza sauce, cheese and pizza toppings. Bake for 10-12 minutes.

Topping ideas: For my two year old I made plain cheese, for my husband cheese and peperoni and for me I made a veggie (tomatoes, onions, & zucchini).

Saturday, July 10, 2010

Salt and Pepper Red Potatoes

I thought I cooked an all-around delicious meal for Father's Day but these were so good that this is all people commented on. In other words--make these! You won't regret it!


Salt & Pepper Red Potatoes

Your Homebased Mom


small red potatoes

butter

olive oil

coarse salt

coarse pepper (I just used whole peppercorns and smashed them up a bit!)


Bake at 350 degrees. I used a 8 x 8 pan and placed about 2 Tbsp melted butter in the pan. After washing potatoes, dry them. Place potatoes in pan and turn to coat with the butter. Drizzle with olive oil. Sprinkle generously with salt (don’t be afraid to use a lot!) Sprinkle with pepper and bake in oven for 2 hours. Back uncovered. I promise they will be o.k.

After removing from the oven place in bowl and pour the sauce left on the bottom of the pan over the potatoes.

Friday, July 9, 2010

Strawberry Sauce

Strawberries are so cheap these days that I had several "getting older" pints in the fridge. This was the perfect remedy to use a lot of older strawberries quickly. I topped crepes with them and then stored the rest for later use!

Strawberry Sauce

1 pint strawberries
1/3 c. white sugar
1 tsp. almond extract (my favorite) or vanilla extract
Wash strawberries and remove stems.

Combine berries, sugar, and extract in medium saucepan and bring to a simmer over medium heat. Cook for five minutes, stirring/breaking strawberries up with a wooden spoon constantly.

After five minutes, remove from heat and allow to cool slightly (if you have a glass blender jar) and a lot (if you have a plastic blender jar). When cool enough, transfer mixture to blender and pulse until desired consistency is reached.

Wanna know what to do with it?
--Make banana splits with this and Sara's hot fudge sauce
--Drizzle over plain ol' cheesecake
--Spoon some over this ice cream, with or without the cinnamon (depending on how brave you're feeling)
--I'm envisioning this sauce atop a pizzookie with sugar cookie dough and lemon ice cream
--My proudest use of strawberry sauce: mix
a couple of tablespoons (depending on the size of the glass and your own personal taste) with this fresh-squeezed lemonade for strawberry lemonade. So so so so good...
--Chocolate waffles, anyone? If that's not your thing, you could put them on your favorite French toast, waffles, or pancakes. Speaking of French Toast- try this one!
--Drizzle over angel food cake and add a dollop of sweetened whipped cream.

Thursday, July 8, 2010

Basic Crepes

I made these for Father's Day dessert. They were light and delicious, especially with the strawberry sauce! It took a few rounds to get the right shape--but well worth the trial and error!

Basic Crepes
Our Best Bites

2 eggs
2 Tbs canola oil
3 Tbs sugar (omit if making savory crepes)
1 C flour
1 1/3 C milk

Combine all ingredients in a blender and blend on low speed until combined, or whisk by hand until there are no lumps.

Heat a non-stick skillet to medium-high heat. Hold pan with one hand while you pour the batter with the other hand. Twirl the pan in a circular motion pouring just enough batter to coat the bottom of the pan. Place on cooking surface and cook until edges are set and you can easily run a rubber spatula around the edge of the pan, 30 seconds. Flip crepe and cook an additional 15-20 seconds. Remove crepe from pan and either keep warm in the oven or cool to room temperature.

Fill with your choice of savory (meat, cheese, vegetable) or sweet (pudding, mousse, pastry cream, fruit) filling. Top sweet crepes with with Strawberry Sauce, Buttermilk Caramel Syrup, Hot Fudge,(recipes can be found on Our Best Bites blog) or just a dusting of powdered sugar and sweetened whipped cream.

Tuesday, July 6, 2010

Cheesy Parmesan Italian Biscuits

Don't let this recipe scare you! When I saw that I was rubbing mayonnaise on these I thought it sounded so nasty! However, these were so DELICIOUS! I halved the recipe and spread a lot less on the biscuits and they were still really tasty!

Cheesy Parmesan Italian Biscuits
Mom Spark

1 c. grated Parmesan (I used the kind in the green bottle, the way my mom did, but feel free to fancy it up and use freshly grated Parmesan)
2/3 c. mayo
2-3 Tbsp. fresh chopped green onion
Garlic powder to taste
Italian seasoning to taste
1 can Hungry Jack flaky biscuits

Mix all ingredients except biscuits. Flatten biscuits on an ungreased cookie sheet. Spread an equal amount of filling over all biscuits. Bake 13-15 minutes, eat hot! Makes about 10 biscuits.

Monday, July 5, 2010

Grilled Ribeye Steak with Onion-Bleu Cheese Sauce

This was the dinner that I made Brian for Father's Day and it was soooo good. The sauce was divine and very rich. If you have a special occasion coming up, then put this on your menu. I got my steaks at Costco- they come in a 4-pack so I used the first two for this recipe and the next two on the 4th of July. But, you could really use any type of steak with this. Enjoy!
Picture courtesy Pioneer Woman Cooks
Grilled Ribeye Steak with Onion-Bleu Cheese Sauce
Pioneer Woman Cooks

2 whole Ribeye Steaks
2 Tablespoons Butter
Salt
Pepper
4 Tablespoons Butter
1 whole Very Large Yellow Onion, Sliced
1 cup Heavy Cream
½ cups Crumbled Blue Cheese

Salt and pepper both sides of the steaks and grill in 2 Tbs. butter to desired done-ness. Saute onions in 4 tablespoons butter over high heat. Cook for 5 to 7 minutes, or until dark and caramelized. Reduce heat to simmer and pour in cream. Cook for 3 to 5 minutes, or until reduced by half. Stir in blue cheese until melted. Serve steaks on generous portion of sauce.

**On the Fourth, we generously salted and peppered both sides of the steak. Then, we drizzled extra virgin olive oil on both sides and grilled to medium...amazing.

Friday, July 2, 2010

Easy Cooked Carrots (That Your Kids Will Eat!)

These carrots are so easy, obviously healthy, and de.lic.ious. You could make them whenever you need yummy veggies in a pinch.

Easy Cooked Carrots

Carrots- you can use baby carrots or regular ones
Butter
Pepper
Honey

If using regular carrots, I peel them and cut them on the diagonal- because it looks more fancy. :) Steam the carrots to desired tenderness- I usually leave a little crunch in them. Then, I melt butter in a saucepan (about 1/2 Tbs. per 3 large carrots). Toss them in the butter for just a bit and then add about 1 tsp. honey (again, per large 3 carrots) and sprinkle with desired amount of pepper. These measurements are estimates, so you have to figure out what works for you- you might want more butter or honey- its all about your own preference. You are going to love these!!

Thursday, July 1, 2010

Corn Salad


I just noticed that I had a typo in the ratio for the simple syrup. Sorry it took me so long to notice it! I make my own sugar water for the hummingbirds and use a ratio of 1 to 4 sugar to water. When I make this salad, I just steal a little of that liquid, which I store in the refrigerator. You can simply mix 1/2 cup of water and 2 TBS of sugar, if it's easier for you.

Knee high by the Fourth of July... you ever heard that? That used to be the old adage about corn. With all the new hybrids and what not, it doesn't hold very true anymore. In fact, we've been seeing some pretty darn good local sweet corn in the markets for a little while now.

This is a perfect recipe to serve on the Fourth. It's quick and easy, holds well on a hot day, and is sweet, crunchy, and super delicious. Back when I was going to the farmer's markets in Ohio, one of my fellow sellers would while away the time eating corn fresh off the cob... you know... raw. I'd never seen anyone do that before and it seemed kind of odd to me. Who the heck knew that raw corn is so stinking wonderful? I like to cut it off the cob, myself, otherwise you splash corn juice over four counties, but it is really good stuff. Raw corn is much crunchier and sweeter than when it is cooked. Put it together in a salad like this, and you'll get rave reviews every time!

Corn Salad
Yield: approximately 2 quarts of salad

5-6 fresh ears of corn, kernels cut off
1 cup minced sweet onion
1 cup seeded, diced fresh tomato
1 mostly peeled, seeded, diced cucumber

2/3 cup red wine vinegar
1/2 cup vegetable oil
1/2 cup simple syrup (a 1 to 4 ratio of sugar to water, i.e. about 2 TBS sugar)
3/4 tsp beau monde seasoning
1/4 tsp dried dill
1/2 tsp salt (or to taste)
dash ground pepper
1/8 tsp guar gum (optional - helps emulsify dressing)

Mix together all ingredients and put in the refrigerator for at least one hour before serving. When cutting the kernels off of the corn, try not to cut too far back in the cob or you will get the tougher part of the kernel in with your salad. Do not scrape the cob for the milk like you would if making creamed corn. I like to peel my cucumbers most of the way for taste but leave a little peel on for color.