Tuesday, May 31, 2011

Spinach and Great Northern Beans

I am always looking for new and interesting, but fast, side dishes that are on the healthier side. In this case, I was looking for a side dish that packed a little more of a sustained punch than most vegetable side dishes without being a lot of empty carbohydrates. I love eating a big plate of broccoli and it fills me up, but I'm hungry again in less than an hour. I wanted a dish that would stick with me a bit longer. Fortunately, I have come to realize that I absolutely adore great northern beans. Their creaminess is so wonderful, but I find they need a little something-something to go with them. This dish surely lets them shine.

Spinach and Great Northern Beans
Yield: 2 generous side servings

1 15 oz can great northern beans, drained and rinsed
8 oz fresh spinach
1 clove garlic, minced
1 TBS olive oil
salt and pepper to taste

Heat a saute pan over medium high heat. Add the oil and the garlic, letting them sizzle together for a minute or two. Add the spinach and toss occasionally so that it cooks evenly. When the spinach is mostly wilted, add the beans and cook for just so that the beans are heated through. Remove from the heat, add salt and pepper to taste, and serve. Be careful not to saute the beans too long or they will dry out and be less appealing.

Cookies, Strawberry Jewels

So, the other day I was sleeping on the sofa, and I thought I had heard a knock  on the door, I opened my eyes, and listen carefully to see if someone was really at the door, but I didn't hear anything so I went back to sleep..

Later than same day, I opened my door to go outside and I found a plastic bag filled with Chocolate and Vanilla cookies, and a little note! It was from our new neighbor, who had just stopped to say Hi!
So I decided to make some cookies and go introduce myself, and thank them for the cookies they left at the door! :D
So here is the recipe:

Ingredients:

  • 2 sticks unsalted butter, soften
  • 1/2 cup powdered sugar.
  • 3 teaspoon vanilla extract
  • 2 cups all purposed flour
  • 1 teaspoon salt
  • strawberry marmalade

Preheat the oven to 325°F.

Mix flour and salt together, set aside.

In an electric mixer, cream butter and sugar. (mix for around 3-5 minutes until you get a creamy texture)
Scrape the sides of your bowl and add the vanilla extract.

Blend in the flour and mix for another 3 minutes, until everything is combined into a soft dough.


Grab about a tablespoon of dough and with your hands roll it into a small ball, with your finger press down the center of your ball to create a small depression, place on baking sheet and continue to repeat this process.


Now it is time to fill in the cookies (the depression we created with our finger), add about 1/4 teaspoon of marmalade to each and bake for around 15-20 minutes.


You can leave the cookies like that, or you can dust them with some powdered sugar or cocoa powder!
and you are done!!

Enjoy!!

Watch my Video Recipe HERE

Chicken and Sausage Jambalaya...

One pot meal! Easy to make and easy to clean:

Ingredients:


  • 6 pieces chicken (or one whole chicken cut in pieces)
  • 2 1/2 cups sausage, sliced
  • 1 cup chopped turkey ham
  • 1 tomato, diced
  • 1 bell pepper, diced
  • 1 1/2 cup white drice
  • 1/2 cup chopped onions
  • 2 garlic cloves, chopped
  • 2 cups of chicken stock
  • 1 cup of water
  • 2 tablespoons Olive Oil
  • 1 teaspoon dry thyme
  • 1 teaspoon cayenne pepper
  • 1 teaspoon Tabasco sauce
  • salt and pepper to taste
  • chilly powder (optional)

Soak the rice in some water and set aside.

Season the chicken with some salt, black pepper and chilli powder, add a tablespoon of olive oil and rub the seasoning and oil all over the chicken.

In a large skillet, heat the remaining 2 tablespoons of olive oil, add the chicken and cook for about 3 minutes on each side, we just want to get a nice brown color on it..it will finish cooking later. Remove the chicken from your skillet and set aside.
Add the ham, sausage, onions, green pepper, tomato, and garlic, stir together and add thyme, cayenne pepper, 1 teaspoon salt and 1 teaspoon black pepper, stir again and cook for 5 minutes.

Drain the rice and add it to your skillet, also add the Chicken stock plus 1/2 cup of water and a dash of hot sauce, stir together and bring the chicken back into the skillet, taste to check the seasoning, add more salt and pepper if needed.

Cook at low heat for around 30-35 minutes until the rice is tender and the chicken is completely cooked.
Feel free to add more liquid (water or chicken stock) if needed.

Garnish with some parsley and you are ready to eat!

Enjoy!

Watch my Video Recipe HERE

Monday, May 30, 2011

Peach-Rosemary Freezer Jam

Once upon a time, there was a wife who talked her husband into buying a little patch of land with some peach trees on it. There were four peach trees: two yellow fleshed and two white fleshed. This wife had always dreamed of having her own peach trees, ever since she was a little girl "helping" her Nana can the peaches from a backyard tree.

When the first season came around, the wife watched, entranced as blossoms came with a multitude of honeybees earnestly going about their work. And when the blossoms set fruit, she rejoiced over each hard green marble. And as the season went by, she mourned the necessity of thinning such an abundance of fruit. And then one day, she walked out to check on the fruit of her labor and was rewarded with this sight:

Big, beautiful, aromatic, juicy, delicious fruit. And then she looked at the four trees and went, "Oh, my, but that's a heck of a lot of peaches."

And, indeed, it was. And so the canning began. And continued... and then continued some more.

But then one day, the wife and her husband got orders from the military: "Thou shalt sell your beloved farm and move to the suburbs in Florida." And so they did... leaving those beautiful peach trees behind.

Fortunately, Georgia peach country isn't that far from the panhandle of Florida. There's a fruit stand in town that sells the things and isn't ashamed to let a box of cast offs go to a gal for a decent price. I got this fifteen pounds of slightly blemished peaches for only five bucks. This box made seven 8-oz jars of jam and eight pints of cut peaches in syrup. Not a bad deal! Fortunately, when making jam, you can simply cut around all the bruises.

I made this jam once before in a cooked variety and it was decent, but I left the rosemary in too long and once the peaches lost their "fresh" taste when cooked, it just wasn't as good. However, when I tried the combination this time as a freezer jam? Heaven! The subtle aroma and flavor of the rosemary just adds a certain je ne sais quoi to the peaches. It may sound weird, but I urge you to give it a try!

I used the peach freezer jam recipe from a box of Certo liquid pectin. All I really did differently was add two four inch springs of rosemary to the fruit and sugar and let it sit a while, stirring periodically. I tasted every so often and continued to let it sit until the flavor was just right. When is it just right? Well, when it tastes good to you! It took my fruit about an hour to infuse to the level of flavor I thought right. Use your best judgement! Once the fruit tastes right, remove and discard the rosemary sprigs.

Add the pectin and lemon juice as instructed on your package and put into containers. I prefer jars, but you can use whatever floats your boat. Such a pretty hue! And oh so tasty!

Peach-Rosemary Freezer Jam
Yield: 7 or 8 cups
Adapted from the Certo Liquid Pectin Insert

2 3/4 cups finely chopped peaches
6 1/2 cups sugar
2 pouches Certo liquid pectin
1/3 cup fresh lemon juice
2 4-inch rosemary sprigs

Remove the peel in a boiling water bath and pit and chop into small pieces. While working, toss finished pieces into a water bath with some lemon juice or fruit fresh to inhibit browning. Drain and measure out the fruit and add to the sugar. Stir together. Add the rosemary sprigs and let sit, stirring occasionally, until the peaches have a nice, subtle hint of rosemary, about an hour.

Remove the rosemary sprigs. Mix the pectin and lemon juice together and let them sit for ten minutes. Add the lemon pectin mixture to the fruit mixture and stir continuously for three minutes. At this point, the mixture should only have a few sugar crystals remaining.

Pour the jam into prepared containers, leaving a half-inch of head space for expansion as the jam freezes. Let the jam stand at room temperature until it is set, up to 24 hours. Freeze until ready to use. Thaw in the refrigerator before use.

The Ultimate Marinade

photo from howsweeteats.com
I don't know if it's because of the amazing Costco steak, or the amazing marinade-but HOT DOG! this stuff was good.  Seriously, I don't need to go out to eat if Jake can grill me up an amazing slice of beef like this!


The Ultimate Marinade
Recipe from howsweeteats.com

1/3 cup soy sauce
2 tablespoons olive oil
1/4 cup sherry wine
1-2 tablespoons brown sugar
2-3 garlic cloves, minced
1/4 teaspoon ginger powder

Combine all ingredients together and mix in a large bowl or baking dish. Whisk until sugar has disolved and pour over meat, seafood or veggies.

Tuesday, May 24, 2011

Chicken Patty!!!

Today I bring to you a super easy and delicious Chicken Patty! It cooks in less than 15 minutes!
This dish is perfect for hot summer days when you don't really feel like being in the kitchen all day!
You can eat it by yourself, for lunch or dinner, or you can invite some friends over to enjoy this delicious and really easy to make and versatile dish! 

Ingredients:


  • 1 pound of ground chicken (or any kind of ground meat you like)
  • 4 pieces of turkey bacon (or any kind you like)
  • 3 tablespoons of grated onion
  • 4 tablespoons of chopped cilantro
  • 1 garlic finely chopped
  • 1/3 cup bread crumbs
  • 1 1/2 tablespoons yellow mustard
  • 2 tablespoons Worcestershire sauce
  • 1 tablespoon chicken flavor seasoning
  • 2 tablespoons olive oil.
Cut the bacon in small pieces and cook on medium-high heat for about 2-3 minutes. (till is brown) Set aside.

In a large bowl we are going to mix all our ingredients, the chicken, onion, cilantro, garlic, bread crumbs, mustard, Worcestershire sauce, chicken seasoning and finally add the cooked bacon mix together and add 1 tablespoon of olive oil, mix again till all the ingredients are incorporated and start forming your patties.

This recipe makes 4 large patties.

Add 1 tablespoon of olive oil to your skill at cook your patties at medium heat for around 5 minutes on each side. Just turn your patties once.

At the last minute I will add a teaspoon of water to each of my patties and turn off the stove, and let your patties rest on the pan for around 2 minutes before serving.


 You can serve these patties with a delicious black bean Salad.


If you don't like Black bean salad, serve this with white rice, corn on the cobb and some avocado slices, garnish with some cilantro!


  Or if you prefer, you can serve this patty as a burger. Grab your favorite buns, a slice of your favorite cheese, some lettuce, a slice of tomato, some onion slices, some jalapeno peppers and start building your burger!
Finish it up with some fries! Enjoy!

To watch this Video Recipe click HERE

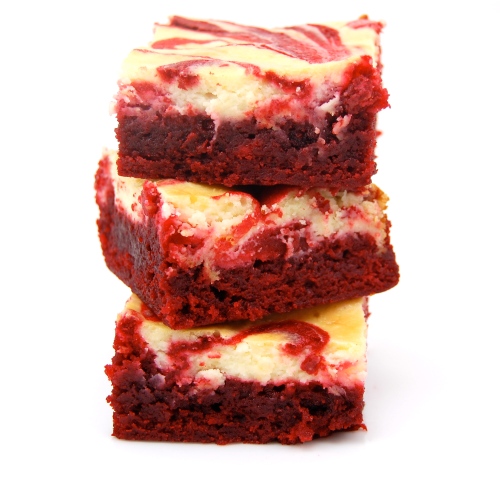
Red Velvet Cheesecake Brownies

Photo from sweetpeaskitchen.com
I want everyone to know that I don't eat all of this stuff by myself.  I sound like a real porker!  I made these for someone else.  I might have eaten several of them-but certainly not all of them.  They were good.  Real good.  I had to bake them about twice as long--weird, I don't know why--but don't give up!  They were good.  Real good.


Red Velvet Cheesecake Brownies
Recipe from sweetpeaskitchen.com

Ingredients:
  • 1/2 cup butter
  • 2-oz dark chocolate, coarsely chopped
  • 1 cup sugar
  • 2 large eggs
  • 1 tsp vanilla extract
  • 1 1/2 tsp red food coloring
  • 2/3 cup all purpose flour
  • 1/4 tsp salt
  • 8-oz cream cheese, room temperature
  • 1/3 cup sugar
  • 1 large egg
  • 1/2 tsp vanilla extract
Directions:
  1. Preheat oven to 350F. Butter the bottom and sides of a 8 inch metal baking pan. Put a long piece of parchment paper in the bottom of the pan, letting the parchment extend up two sides of the pan and overhang slightly on both ends. (This will make it easy to remove the bars from the pan after they have baked.) Butter the parchment.
  2. In a small, heatproof bowl, melt butter and chocolate together. Stir until combined and very smooth. Set aside to cool for a few minutes.
  3. In a large bowl, whisk together sugar, eggs, vanilla extract and red food coloring. Add chocolate mixture and stir until smooth. Add flour and salt and stir until just combined and no streaks of dry ingredients remain.
  4. Pour into prepared pan and spread into an even layer.
  5. To prepare cheesecake mixture, beat cream cheese, sugar, egg and vanilla extract in a medium bowl until smooth. Distribute the cheesecake mixture in 8 dollops over batter in the pan. Swirl in with a knife or spatula.
  6. Bake for 35-40 minutes, until brownies and cheesecake are set. A knife inserted into the cheesecake mixture should come out clean and the edges will be lightly browned.
  7. Let cool completely in pan on a cooling rack before lifting out the parchment paper to remove the brownies.

Wednesday, May 18, 2011

Cheddar Biscuits!!!

I Love, like seriously, I really do love Cheddar biscuits, and I could eat them every single day of my life!! When I created this recipe I was trying to recreate Red Lobster's Garlic and Cheddar biscuits, but seriously this recipe is way better! Click HERE to watch my video recipe

makes 6-8 large biscuits!
Ingredients:

  • 2 cups flour
  • 1 cup shredded cheddar cheese
  • 3/4 cup heavy cream
  • 1/3 cup butter
  • 2 teaspoons baking powder
  • 1 teaspoon Garlic powder
  • 1 teaspoon Italian seasoning
  • a pinch of salt
  • + 4 tablespoons of butter and 1tspn garlic powder and 1tspn Italian seasoning.

Preheat the oven at 450°F.

In an electric mixer, at slow speed, we will mix all the dry ingredients: flour, salt, baking powder, garlic powder and Italian seasoning.

Once all the dry ingredients are mixed together we will cut in 1/3 cup of butter and continue to mix for about a minute or so. (mix for more time if needed)  We want our dough to have the texture of coarse crumbs.

Add the heavy cream and mix together till we get a soft  yet firm dough.  Add the cheddar cheese, mix with your hands, till the cheese is completely incorporated with the dough, get ready to start forming your biscuits!


Just grab some of your dough and roll it with your hands into a ball.... keep doing this till you have all your biscuits ready.


In a small bowl melt 4 tablespoons of butter and add  1tspn garlic powder plus 1tspn Italian seasoning, mix together and brush your biscuits with this garlicky butter.

Bake your biscuits for around 15 to 18 minutes at 425°F

(all ovens are different, cook for longer if needed, also if you oven heats like crazy, you can cook this at 400° for 20-25 or 375°F for 22-25 min.) 

Enjoy!!!

Spicy Potato Wedges

Potatoes are one of my favorite side dishes, they are so versatile, you can bake them, fry them, boil them, either way they are always delicious and go great with any main dish... and the best part they are Budget friendly, you can feed an army with them and your wallet wont be broke!! Click HERE to watch this video recipe!!!

Serves 4 (side dish)

Ingredients:
  • 2 large Idaho Potatoes (or as many as you want)
  • 2 tablespoons Paprika
  • 2 tablespoons Garlic powder
  • 2 tablespoons Dry Oregano
  • 2 tablespoons Minced Onion
  • 2 tablespoons Chilli Powder
  • 1 tablespoon Ground Black pepper
  • 1 tablespoon Salt
  • 1 tablespoon Ground Cumin 
  • Crushed Red Pepper to taste
  • 2 tablespoons Olive Oil
Preheat oven at 400°F.

Cut the potatoes lengthwise in about 6 wedges and then cut them in half.

Mix all your spices together and set a side for a minute.

In a large bowl combine the olive oil with the potato wedges, make sure all the potatoes are covered with some oil and sprinkle the spicy blend all over the potatoes.  Sprinkle as much or as little as you want. 

Once your potato wedges are completely coated with the spicy blend we will place them on a baking sheet and they will go into the oven for about 20 -25 minutes at 400°F.

Enjoy!!!

Baked Tilapia!

This recipe also makes great fish tacos.  Click HERE to watch my video recipe!!!
Serves 4. 
Ingredients:
  •  4 to 6 Tilapia Fillets
  • 2 eggs
  • 1/2 cup of flour
  • 2 cup of crushed Saltine  crackers
  • 1 tablespoon black pepper
  • 1 tablepsoon paprika
  • 1 tablespoon  chilli powder
  • 1 tablespoon garlic powder
  • 1 tablespoon minced onion
  • 1/2 tablespoon of ground cumin
  •  salt and pepper to taste
Preheat your oven at 400° F

Add a teaspoon of salt and  1 teaspoon of black pepper to the eggs and whisk together. Set aside.

Mix 1/2 tablespoon of salt and 1/2 tablespoon of black pepper with the flour. Set aside.

To the cracker crumbs we will add a tablespoon of each: Black pepper, paprika, chilli powder, garlic powder, minced onion and ground cumin, add salt and pepper to taste. Combined and get ready to start coating the fish.

Coat the fish with the flour mixture, then dip it right into the egg mix, and finally coat it with the seasoned cracker crumbs.

Place in a baking sheet layered with some parchment paper and bake for 10 minutes at 400°F.


And you are done...
You can serve this with rice, some potatoes, a salad, or anything else you want... 


This recipe also makes delicious fish tacos...
Heat up some corn tortillas, get some shredded lettuce, a tomato, a small onion and your favorite salsa!

And you are ready to start building your tacos
Top them with some sour cream and lemon juice!

Enjoy!!

Tuesday, May 17, 2011

White Chicken Enchiladas with Green Chile Sour Cream Sauce

photo from danellemphotography.com

Hold up. Let me wipe the drool from my chin.  Yeah, these were good.  I mean really good.  I mean, let's have these leftovers the next night and they even taste better good.  I liked them.

White Chicken Enchiladas with Green Chile Sour Cream Sauce

From letsdishrecipes.blogspot.com
Ingredients
8-10 soft taco size flour tortillas
2 cups shredded Monterrey jack cheese, divided
2 cups shredded cooked chicken
3 tablespoons butter
3 tablespoons flour
2 cups chicken broth
1 cup sour cream
1 (4 oz) can diced green chiles
Chopped, fresh cilantro for garnish (optional)
Directions
Preheat oven to 425 degrees. Mix together 1 cup of the cheese and the chicken. Place an equal amount of the chicken mixture into each tortilla.  Roll up and place seam side down in a lightly greased, 9 x 13-inch pan.
In a skillet or saucepan, melt the butter. Stir in the flour and cook for 1 minute. Add the chicken broth, whisking until smooth. Cook over medium heat until thick and bubbly. Stir in the sour cream and green chiles. Pour sauce over the top of the enchiladas; sprinkle with remaining shredded cheese. Bake for 20 to 25 minutes. Sprinkle with cilantro, if desired.

Monday, May 16, 2011

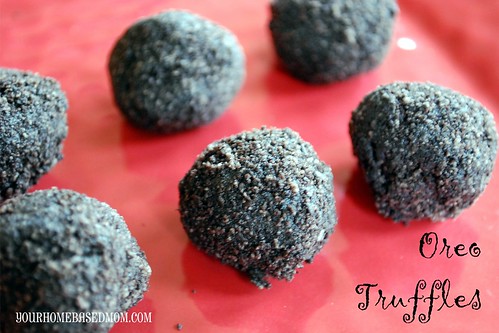
Oreo Truffles

photo from yourhomebasedmom.com
I know these have been a 100 times or more but here's why I like this recipe: no dipping involved!  I am averse to dipping things.  It never works for me and it never looks pretty.  These were awesome because they were so quick.  I just rolled them in crushed oreos after.  Oh, and they are so good, and yet so bad!

Oreo Truffles
allrecipes.com

1 16 oz. package of Oreos, divided.  Total of 45 oreos
1 8 oz. package of cream cheese, softened
Crush 9 Oreos in blender and set aside.  Crush remaining 36 Oreos.  Beat cream cheese until smooth and add 36 crushed Oreos.  Beat until well mixed.  Form into 1 inch balls and then roll in remaining crushed Oreos.  Refrigerate until firm.  Enjoy!

Strawberry Topping

I just love this time of year. In many areas, strawberries are one of the first real fruit crops of the season, and it always gets me excited about things to come. While strawberries are undeniably at their best fresh out of the field: warm, sweet, and juicy, they just don't keep long fresh. Fortunately, there is an easy and delicious way to enjoy strawberries year round. If preserved properly, strawberries can come out of the freezer tasting very much like they went in. There's nothing better than enjoying strawberry shortcake in November or strawberry topping on waffles with whipped cream in January.

The first step is to rinse and cut up the berries. Remove any overly ripe parts and rotten spots. Remove the stems and cut into roughly nickel sized pieces. For every quart of prepared berries, squeeze about half a lemon's worth of juice into them. Please note that all of the measurements in this process are very loose; simply taste as you go to be sure it's right for your palate.

Then add some sugar. For a quart of berries, I use between half and one cup of sugar typically. But, again, it will always vary depending on the sweetness of the berries. One point to keep in mind, however, is that you don't want to skimp too much on the sugar. The sugar helps thicken the topping and keeps that beautiful red color vibrant. Use too little sugar and you may be a bit disappointed in the results.

Stir the sugar in and then gently crush the berries with your hands. Do not use any mechanical means to complete this step. You do not want the berries pulverized, just gently crushed. This step helps the berries to release more of their juice and also damages the cell walls in the strawberries enough that freezing the topping will no longer change its texture or structure much.

Don't crush things too much. You still want some nice sized pieces in there. In this image, the topping is sitting in a large serving spoon which is about three inches long. Look at all that delicious syrup that's developed!

At this point, spoon the mixture into freezer containers. I like square ones like these (I picked mine up at Wal-Mart a few years ago). Be sure to leave a half-inch at the top of the container so the mixture can expand as it freezes without making a mess of your freezer. Just as an FYI, this batch of twelve pint containers was from one flat of strawberries.

When you are ready to use, you can defrost them in the refrigerator, on the counter, or in the microwave (just go gently!). Spoon over cakes, ice cream, waffles, or oatmeal. Use to make the best daiquiris or margaritas ever or use to make a delicious smoothie. Or defrost only enough to get a spoon in there to scrape out frozen bits and serve over your favorite cold cereal or as a frozen dessert with whipped cream.

What I love most about putting these little containers in the freezer is that they are so darn versatile!

Thursday, May 12, 2011

Spanish Rice

Photo from sisterscafe.blogspot.com
More authentic?  Yes.  This is just like the rice you get at El Charro-shout out Griffin, GA!  I thought it was a bit bland--as most true authentic mexican is--but Jake loved it.  And FYI-the recipe sounds weird, but just follow it, mysteriously it actually works.

Spanish Rice
Recipe from www.www.thesisterscafe.com

1-2 T. oil
2 c. white rice
1/2 (8 oz) can tomato sauce
1/2 onion, cut into chunks
3 T. chicken bouillon granules
5 c. water
Heat oil in skillet and fry rice until light brown. Add tomato sauce and stir. Turn heat off. Blend onion, bouillon and water in blender on high until pureed. Add blender mixture to rice, stir well and cover. Bring rice mixture to a boil, over medium-high heat. Once liquid level has dropped below the rice, turn heat down to low and simmer 30-35 minutes. Move rice to see if liquid remains. If so, keep simmering. Once rice is done, you may crack the lid to let steam out and let sit for 10-15 minutes before serving (this helps the rice dry out a little and not be so sticky).

Wednesday, May 11, 2011

Mexican Chocolate Cake

I don't know what makes this cake mexican-I just know it's delicious and super rich.  When Michelle made it for us there were no nuts-definitely what I prefer.

Mexican Chocolate Cake 
Recipe from Michelle Chapman (in my ward)

2 sticks unsalted butter
1/2 cup Dutch-process unsweetened cocoa powder
3/4 C Water
2 C granulated sugar
2 large eggs
1/2 C well-shaken buttermilk
2 TBS vanilla
2 C all-purpose flour
1 tsp baking soda
1/2 tsp cinnamon
1/4 tsp salt

Glaze:
2 C chopped pecans
1/2 stick unsalted butter
1/2 C half and half
1/2 C confectioners sugar
5 oz. fine-quality bittersweet chocolate (not unsweetened) finely chopped
(Michelle’s note:  I like to use Ghirardelli’s Double Chocolate chips here.)
1/4 tsp salt

Make Cake:
Put oven rack in middle position and preheat oven to 350 deg F.  Butter cake pan well and dust with flour, knocking out excess.

Melt butter in a 3 qt heavy saucepan over moderately low heat, then whisk in coca,.  Add water and whisk until smooth, then remove from heat.  Whisk in separately sugar, eggs, buttermilk, and vanilla.

Sift together flour, baking soda, cinnamon, and salt into a bowl, then sift again into cocoa mixture and whisk until just combined (don't worry if there are lumps).

Pour batter in cake pan and bake until a wooden pick or skewer comes out with a few crumbs adhering, 45-55 minutes.  (Leave oven on)

Cool cake in pan on a rack 20 minutes, then loosen edges with a thin knife and invert onto a plate.

Make Glaze:
Spread pecans in 1 layer in a shallow baking pan (1 inch deep) and bake until fragrant and a shade darker, 6-8 min.  Cool pecans slightly in pan on a rack, about 5 minutes.

Melt butter in a 2 qt. heavy saucepan over low heat, then stir in half-and-half and confectioners sugar.  Add chocolate and cook, stirring, until smooth.  Remove from heat and stir in pecans and salt.  Cool glaze until slightly thickened, about 5 minutes.

Spoon glaze over top and sides of cake (cake will still be warm) and spread with a small offset spatula or knife to cover completely.

Cook's note:
Cake (with glaze) can be made 2 days ahead and kept at room temperature in a cake keeper or covered with an inverted bowl.

Tuesday, May 10, 2011

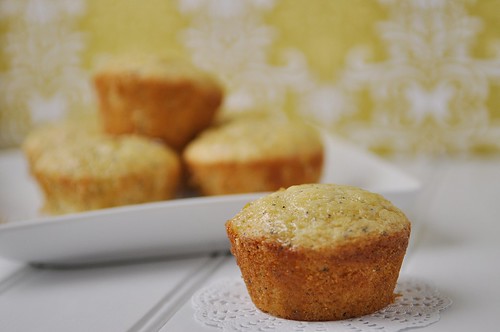
Almond Poppy Seed Muffin

Photo from yourhomebasedmom
These are definitely my new favorite thing!  They were so delicious!  My kids-I mean, my kids-ate these up and wanted more.  These were so tasty!

Almond Poppy Seed Muffin
adapted  by yourhomebasedmom from allrecipes.com


2 eggs
1 C white sugar
1/2 C oil
1/2 C milk or buttermilk
1/2 tsp salt
1 Tbsp baking powder
1 Tbsp poppy seeds
1 tsp vanilla extract
1 tsp almond extract
2 C flour
Glaze:
1/2 C sugar
1/4 C orange juice
1/2 tsp vanilla extract
1/2 tsp almond extract
1 tsp butter
1 tsp orange zest
Beat together eggs, sugar and oil.  Mix in milk, salt, baking powder, poppy seeds, flavorings and flour.  Do not over mix.
Fill greased muffin tins 3/4 full.  Bake at 350 for 15-20 minutes or until a toothpick inserted comes out clean. Cool until slightly warm and then add glaze.
Glaze:
While baking mix together glaze and allow it to cool a bit and thicken slightly.  In a saucepan over low heat combine sugar, juice, extracts and butter.  Stir until sugar is dissolved.
Once glaze is cooled to room temperature dip tops of slightly warm muffins into glaze.

Friday, May 6, 2011

Choco-Banana

Are you craving something sweet, yet nutritious and full of flavor, maybe something chocolatey?


Well you came to the right place, I have a perfect EASY, delicious and healthy alternative just for you!!

Ingredients

Bananas
1 cup of dark chocolate morsels
and some toothpicks

Peal the bananas, cut them in thirds and place them in the freezer while you melt your chocolate morsels.

To melt the chocolate, you can do it the microwave. It will take like 3 minutes, just do it one minute at a time, and be sure to stir your chocolate in between every minute. (to prevent the chocolate from burning)

The best way to do it is using a double boiler. Melt your chocolate and once is done, you are ready to dip your bananas in.

You can use anything you wan to add a little extra texture to your banana.
Drizzle with some white chocolate,
sprinkle with some colored sugar, nuts, or anything you want.

You are ready to eat! Of course if you put your choco-bananas back in the freezer for around 10 more minutes... they will be even better! They will be cool and will have a delicious chocolatey crunch!

Enjoy!!!!

Apple Cinnamon Oat Meal

Ingredients:

2/3 cup Old Fashion Oats
2/3 cup Fat Free Milk
1 teaspoon cinnamon
1 (or 2) tablespoon brown sugar
pinch of nutmeg
pinch of salt
1 apple (diced)


In a small pan we will be heating up the diced apple with the cinnamon, brown sugar, nutmeg and salt. Cook for around 1 minute.
Add the milk and bring to a rapid boil. Reduce the heat to low and add the oats, let simmer for around 3 minutes and serve, garnish with diced apples and raisins.


Enjoy!

Banana Bread Oat Meal

Serves 2.

Ingredients:

1 banana or two.
2/3 cup Old Fashion oats
2/3 cup Fat Free Milk
1 tablespoon honey
1/8 vanilla extract
1 teaspoon brown sugar
1/4 teaspoon cinnamon
pinch of salt
pinch of nutmeg
pecans.

(medium heat). In a small pan we will smash the banana together with the honey, vanilla, brown sugar, cinnamon, salt, and nutmeg, mix together and cook for a minute.

Add the milk and bring to a rapid boil. turn down the heat to low and add the oats, let simmer for around 3 minutes.
Sprinkle your pecans on top and you are ready to eat!

Enjoy!

Thursday, May 5, 2011

Monte Cristo Sandwich

Photo from cdkkitchen
Another easy peasy mid-week meal.  I've always been nervous about pairing jam with monte cristo's--but honestly it made it taste better.  Even my super picky youngins ate these! (By the way, this picture is not what they actually look like since they are made with crescent rolls--I couldn't find another one!)

Monte Cristo Sandwiches

Ingredients to serve four:
Ultra thin sliced deli meat of your choice
Cheese or combination of cheeses of your choice.  Sliced or shredded.  Same diff.
Pillsbury Crescent rolls. One can makes four sandwiches.  Plan accordingly.
Jam.  We are boysenberry fans here, but raspberry or strawberry would work fine too.  But boysenberry is better.
Powdered sugar.
 Line your baking sheet with foil.
Spray it with Pam.
These guys tend to stick, or the cheese melts out the sides.  Who wants to scrape melted cheese?
Unroll the crescent rolls, making sure to keep them in rectangles.  See how two triangles make a rectangle? 
With your finger, lightly press together the seams where the triangles meet.
 Sprinkle or tear the cheese so it fits on each rectangle.
Layer on a few pieces of meat.
Fold over the neat little pile of cheese and meat.
Seal edges by pressing down with your fingers.
 Bake until golden brown at 375º for 15-18 minutes.
(Aren't you glad you used foil?)
Serve with a dusting of powdered sugar and a heaping spoonful of jam.

Wednesday, May 4, 2011

Cream Cheesy Quesadillas

While not the fanciest meal you'll ever have, these are easy and very yummy compared to the amount of time invested.  Quick and different mid-week meal.

Cream Cheesy Quesadillas   
Recipe from Real Mom Kitchen
  • 2 cups shredded Monterrey jack and cheddar cheese blend
  • 4 oz of reduced fat cream cheese, softened
  • 1/4 cup salsa
  • 1/4 cup butter, melted
  • 8 (8 inch) flour tortillas
  • additional salsa for dipping
  1. In a bowl, blend together cheese, cream cheese, and salsa.
  2. Divide and spread cheese mixture over 4 of the tortillas.  Top with the remaining tortillas creating 4 quesadillas.
  3. Brush one side of each quesadilla with melted butter.
  4. In a skilled, fry tortilla butter side down.  Brush other side with melted butter.
  5. Fry quesadilla until one side is crisp and brown.  Flip and cook the other side until crisp and brown.  Continue this process until all the quesadillas are cooked on both sides just like a grilled cheese sandwich.
  6. Slice each quesadilla into 4 wedges with a pizza cutter and serve with additional salsa.  Makes 4-6 servings.

Tuesday, May 3, 2011

Julie's Chicken Salad

Julie's Chicken Salad

You know, I would've never thought I would like chicken salad. My mother-in-law (Julie) converted me. I guess I am becoming an adult afterall. All of these ingredients alone I DO.NOT.LIKE. Especially Miracle whip (lets hear it for mayo!), celery and cold chicken. But, somehow, this congolomeration of ingredients is a beautiful mixture that is so satisfying. YUM ! Can't wait to eat another tomorrow for lunch.

Ingredients:
6 chicken breasts, boiled
3 stalks of celery, chopped
1 bunch of green onions
6 hard-boiled eggs, sliced and diced
Sliced almonds toasted to taste
Miracle Whip enough to liking

Directions: Dice chicken, celery, eggs and green onions. Combine in a bowl with Miracle Whip and S&P. Refrigerate for at least 24 hours before (I only did for 6 hours and it was delish!). Serve on Crossiants and sprinkle the salad with almonds directly before serving.

Monday, May 2, 2011

Chicken and Asparagus Black-bean Enchiladas


Photo from foodnetwork.com

This recipe is so refreshing and different!  A couple in our ward made it for us for dinner.  I was a little skeptical to see asparagus sticking out of an enchilada--but YUMMY!

Chicken and Asparagus Black-bean Enchiladas

Recipe from Michelle and David Chapman (in our ward)

 Double this recipe for a 13 x 9 pan of enchiladas!

4 slices bacon
½ pound boneless, skinless chicken breasts, cut into strips
2 cloves garlic, crushed
1 ½ cups salsa, divided
1 (15 oz) can black beans, un-drained
1 small green bell pepper, chopped
½ teaspoon ground cumin
¼ teaspoon chili powder
¼ cup sliced green onions
salt and pepper to taste
4-6 flour or fresh corn tortillas
¾ pound blanched asparagus (about 3 stalks per enchilada depending on the size of stalk)
¾ cup shredded Monterey Jack cheese
½ cup light cream

Cook bacon in a skillet until crisp, remove from skillet, drain and crumble.
Pour off all but 1 tablespoon bacon drippings.
Cook chicken strips and garlic in drippings until tender.
Stir in ¼ cup salsa, beans, bell pepper, cumin, and chili powder.  Season with salt/pepper.
Simmer for 7 or 8 minutes or until thickened, stirring occasionally.
Stir in green onions and crumbled bacon.
Spoon bean mixture down the center of each tortilla. 
Add 2-3 asparagus stalks and top with cheese, reserving ¼ cup cheese for garnish.
Roll up tortilla and place seam side down in a greased 9x9 (or 9x13 if you double recipe) baking dish – Pyrex dishes are best.

RECIPE CAN BE PREPARED TO THIS POINT AND REFRIGERATED UNTIL READY TO BAKE!!!

Combine remaining salsa with cream and pour over top of enchiladas.  Bake at 350 degrees for 15 minutes.  Top with remaining cheese.  Bake for 5 minutes longer or until cheese melts.  Served with rice, chopped tomatoes, sour cream, and additional salsa!

Sunday, May 1, 2011

Southwest Pasta Salad


photo courtesy of ourbestbites.com
Southwest Pasta Salad

Oh, the dreaded salad assignment! It seems so boring when you are asked to bring a salad to a dinner. I was dying to mix it up and so searched on ourbestbites.com and found this gem. YUM!


Ingredients:

1/2 lb. cooked bowtie pasta (I used whatever I had on hand which was whole wheat Rotini)

1 14oz. can black beans rinsed and drained

2 roma tomatoes diced

1 large pepper of any color, diced

1/2 C sliced green onions

1/2 C frozen corn (no need to thaw)

Zest from two limes

optional: add chicken

1/2 C cheese Queso fresco or Cotija cheese (found in the mexican cheese section) or pepperjack cubed


Dressing:

6 T fresh lime juice (about 3 juicy limes)

1/4 C rice vinegar or white wine vinegar

4-5 garlic cloves, chopped

1 1/2 t chili powder

1 t cumin

1/2 t coriander

1/2 t salt

2 t sugar

3/4 C canola oil or EVOO

1/2 C roughly chopped cilantro