Friday, October 28, 2011

Halloween Dinner, Mini Meanloaves

To watch this video recipe click HERE!
To go to the Spooky Rice balls recipe go HERE!

Here is my last Halloween recipe for this year! I hope you like it! Mini BBQ Meatloaves and Spooky Rice Balls! Super easy to make and delicious!

Makes 6-8 mini 5x3 meatloaves
Ingredients:

20 oz ground meat (any kind)
1 1/2 cups shredded carrots
1/2 cup grated onions
1 cup fresh breadcrumbs
1 egg
1 cup of your favorite BBQ sauce plus extra for garnish
1/2 tablespoon black pepper and salt
1/2 tablespoon Extra virgin olive oil
5-8 5x3 mini meatloaf pans
cooking spray

Preheat oven to 375ºF

Combine ground meat with the carrots and the onions,mix together and add the egg and combine thoroughly. Add the breadcrumbs a little at a time and combine until all the ingredients are well incorporated.

Add 2/3 of a cup of BBQ sauce, (you can add more sauce if you feel like the meat is too dry),mix together and season with 1/2 tablespoon of each ground black pepper and salt plus 1/2 tablespoon of olive oil, combine thoroughly and that's about it.

Spray your mini pans with cooking spray and fill them halfway with the meat mixture. Spoon a little more of the BBQ sauce on top, spread it evenly and bake at 375º for about 30-40 minutes or until completely cooked.


Garnish the mini loaves with a cross made of BBQ sauce

Spooky Rice Balls


To watch this video Recipe please click HERE!

Hi everyone!Today, I'm bringing you another Halloween recipe! Spooky Rice Balls, they are super easy to make and can be prepare the day before!!!

Makes 12-15 balls
Ingredients:

1 cup white rice (short-grained or sushi rice are a better option, but it does work with long grain rice.)
1 cup tomato sauce
2 minced garlic cloves
1 tablespoon dry chopped onion
1 tablespoon chicken bullion
1 1/2 cups chicken broth
1/2 cup water
1 tablespoon of vegetable oil
1 large Ziploc bag or plastic wrap

TO GARNISH:
Black olives
1 1/2 in. pieces green bell pepper (1 piece per ball)
1 in. pieces red bell pepper (1 piece per ball)

---OPTIONAL----
To fill the rice balls
3 slices bacon
1 sausage link
3 tablespoon minced onion


I recommend you cook the rice the day/night before.

Soak the rice in hot water for about 5 minutes. Drain and set aside.

Saute the garlic in 1 tablespoon of vegetable oil for 3 minutes, or until the garlic becomes transparent. Add in the rice and season with the dry onion and the chicken bullion stir fry for about 3-4 minutes or until the rice becomes translucent.
Add in the tomato sauce, cook for about 2 minutes. Add in 1 1/2 cups of the chicken broth
and 1/2 of water stir together, cover with a lid and let it cook on low heat for about 30 to 35 minutes, or until the rice is cooked.

We want this rice to be really sticky, so feel free to add more liquid if needed!

OPTIONAL
---To make the filling---

In a small pan I cook the bacon and sausage for about 4 minutes or until slightly brown. Add 3 tablespoon of minced onion and season with a pinch of black pepper and crushed red pepper. Cook for 2 more minutes. Set aside to cool.


If you cooked the rice the day before, sprinkle it with 3 tablespoons of water and heat it in the microwave for about 40 seconds.


Spoon about 2 tablespoons of the rice on to the bag
spread it evenly, and top it with a about 2 teaspoons of
the filling.


Wrap everything into a ball and that's how you make your rice balls!

Continue to repeat these steps until you are done with all the rice.


 To garnish:
 Top the ball with a 1 1/2 inch piece of green bell pepper

Use black olive to form the eyes, (any shape you like)
(the rice is super sticky so the olive should stick to it. If they don't stick, dip the olives in water or soy sauce, and that would do the trick.)


The mouth will be a small piece of red bell pepper and that's it!

Enjoy!

Happy Halloween!!!

Three-Cheese Pasta Bake


Photo from myrecipes.com

A fancy variation on mac and cheese!  This was obviously super cheesy and yummy...just look at it!


Three-Cheese Pasta Bake

Recipe from myrecipes.com


Ingredients

·                                 1 (16-ounce) package ziti
·                                 2 (10-ounce) containers refrigerated Alfredo sauce
·                                 1 (8-ounce) container sour cream
·                                 1 (15-ounce) container ricotta cheese
·                                 2 large eggs, lightly beaten
·                                 1/4 cup grated Parmesan cheese
·                                 1/4 cup chopped fresh parsley
·                                 1 1/2 cups mozzarella cheese

Preparation

·                                 Prepare ziti according to package directions; drain and return to pot.
·                                 Stir together Alfredo sauce and sour cream; toss with ziti until evenly coated. Spoon half of mixture into a lightly greased 13- x 9-inch baking dish.
·                                 Stir together ricotta cheese and next 3 ingredients; spread evenly over pasta mixture in baking dish. Spoon remaining pasta mixture evenly over ricotta cheese layer; sprinkle evenly with mozzarella cheese.
·                                 Bake at 350° for 30 minutes or until bubbly.

Jelly Candies

About a year ago, I posted a recipe for lemon jellies. These cute little lemon candies are so tasty and such a cheerful lemon hue. I absolutely adore them, but what is good in lemon must be good in orange and other citrus flavors, right? So I made a batch of orange ones. I made them exactly how I made the lemon ones, except that I substituted oranges and used orange coloring.

You know what? They weren't right. I was so disappointed because they were cloyingly sweet. Fortunately, I have a fix for that. I got out the old citric acid granules and - voila! - a wonderful orange version of the lemon jellies was born. When I make orange jellies, I add about one half teaspoon of citric acid to the hot mix. If you really want a nice, tart treat, you can also add a little pinch to the dredging sugar.

So, if you want to make a nice, colorful assortment of jellies that looks adorable gifted in little cellophane bags or piled high in a candy dish, make a batch of lemon, orange, and lime jellies. Just be sure to add some citric acid to the orange and lime ones!

Thursday, October 27, 2011

Brown Rice and Black Bean Casserole

We LOVED this casserole...hearty, full of yummy vegetables, and easy to make. Great for leftovers too. We will definitely be making this one again- it really was delicious.
image courtesy allrecipes.com
Brown Rice and Black Bean Casserole

1/3 cup brown rice
1 cup vegetable broth
1 Tbs. olive oil
1/3 cup onion, diced
1 medium zucchini, chopped or thinly sliced
2 chicken breasts, cooked and diced (I used 1/3 of the Costco rotisserie chicken)
1/2 to 3/4 cup sliced mushrooms
1/2 tsp. cumin
Salt, to taste
Cayenne Pepper, to taste
1 (15 oz.) can black beans, rinsed and drained
1 (4 oz.) can green chilies
1/3 cup carrots, chopped small
2 cups shredded swiss cheese

Mix the rice and chicken broth in pot on stovetop, bring to a boil. Reduce heat to low, cover and simmer 45 minutes, or until rice is tender. Preheat oven to 350 degrees. Lightly grease a medium-sized casserole dish. Heat the olive oil in a skillet over medium heat and cook the onion until tender. Mix in the zucchini, chicken, and mushrooms. Season with cumin, salt and cayenne pepper. Cook and stir until zucchini is lightly browned and chicken is heated through. In a large bowl, mix the rice, onion, zucchini, chicken, mushrooms, beans, chilies, carrots, and half of the swiss cheese. Transfer to the baking dish and sprinkle remaining cheese on top. Cover casserole dish loosely with foil and bake for 30 minutes. Uncover and bake 10 more minutes, or until bubbly and lightly browned.

Wednesday, October 26, 2011

Chicken and Mushroom Kebabs

To watch t his video recipe please click HERE!

Hi everyone!

Today's recipe is super easy, very healthy and beyond delicious! I just made this yesterday and I had to upload it right away! I have like 8 more recipes in line to be edited, but this one couldn't wait! I hope you like it as much as I did!

Makes 8 skewers
Ingredients:

2 large chicken breasts
18 medium-large mushrooms (any kind)
18 grape tomatoes (or any other small tomato)
1/2 a large onion cut in chunks
Zest and juice of 1 lemon
2tablespoons chopped fresh rosemary
2 garlic cloves finely chopped
1 tablespoon salt
1 tablespoon ground black pepper
crushed red pepper to taste
3 tablespoons extra virgin olive oil
wooden skewers (8)

Preparation:

Soak wooden skewers in warm water for at least 20 minutes before using.
Preheat oven to 400ºF.

Cut the chicken into bite-size pieces. Season the chicken with the zest of one lemon
1 tablespoon of fresh rosemary,the chopped garlic, 1/2 tablespoon ground black pepper, 1/2 tablespoon salt, the lemon juice and 1 tablespoon of extra Virgin Olive oil. Add crushed red pepper to taste. Combine everything, make sure every piece of chicken is well seasoned and refrigerate for about 5 minutes while we prepare the rest of the ingredients.

Season the tomatoes and onions with 1/2 tablespoon of extra virgin olive oil and a pinch of salt and ground black pepper, also add crushed red pepper to taste. Stir together and set aside for a minute.

Clean the mushrooms with a wet paper towel or a clean wet kitchen towel. Season the mushrooms with 1 tablespoon of extra virgin olive oil and the rest of the rosemary, also add in a 1/4 of a tablespoon of each, salt and ground black pepper. Add crushed red pepper if desired. Make sure every mushroom is well coated with the oil and the seasoning.

And that's all the preparation work. Now we are ready to build the Kebabs.  Build your kebabs any way you want them.

My Kebab has 9 layers, the first one is onions, followed by a mushroom, a piece of chicken, a tomato, another piece of chicken, one more mushroom, more onion, another piece of chicken and finally topped with another tomato.

But feel free to build your Kebab any way you want, you can add as many layers as you like!

Bake at 400ºF for 12-15 minutes or until the chicken is completely cooked!
or

Grill for about 3-4 minutes on each side!

I served my Kebabs over white rice! And that's it, enjoy!

Tuesday, October 25, 2011

Quick and Easy Orange Rolls

Photo from Yourhomebasedmom.com

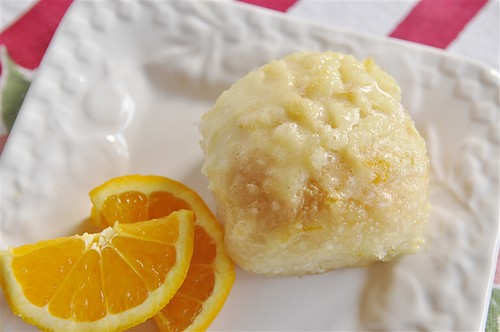
This is the best recipe for a really quick, delicious roll.  If you have time make the real ones, but if you  need something quick and easy these are really good.  Oh, I did not use Orange Essential Oil, I just used orange juice concentrate and it worked great.


Quick and Easy Orange Rolls   


Recipe from Yourhomebasedmom.com

12 frozen Rhodes dinner rolls, thawed
grated rind of one orange
1/2 C sugar


Citrus Glaze:
1 C powdered sugar
1 Tbsp melted butter
2 Tbsp orange juice
Mix together until smooth

Add in 2-3 drops Wild Orange Essential Oil or to desired taste (optional but oh so good!)
Thaw dough in the refrigerator over night or 2-3 hours prior to use. Cover with plastic wrap while thawing.
Grate orange rind and mix with sugar. Roll thawed roll in melted butter and then in sugar and rind mixture.
Place on greased cookie sheet or 9 x 13 pan. Cover with plastic wrap and allow rolls to double in size – approximately 1 hour. Remove plastic wrap and bake at 350 degrees for 20-25 minutes.
Let cool 5 minutes and frost with citrus glaze while warm.
Enjoy!

Sunday, October 23, 2011

Texas Sheet Cake

This recipe is another original from our sister's cookbook- submitted by Jessica. I've made it twice now and its amazing! It feeds a crowd and is great warm or cold- with or without ice cream. Plus, you should have most of these ingredients in your pantry/fridge. Next time you need a crowd-pleaser for a big crowd, put this one on your menu.
Texas Sheet Cake
Jessica Sedgwick

For the Cake:
2 c. flour
2 c. sugar
1 cup butter
4 Tbs. cocoa
1 c. water
1/2 c. buttermilk
2 eggs
1 tsp. soda
1/2 tsp. salt
1 tsp. vanilla

Mix flour and sugar in large bowl. Mix butter, cocoa, and water in saucepan. Bring to boil. Turn off heat and stir into flour and sugar mixture. Add buttermilk, eggs, soda, salt, and vanilla. Stir until well mixed. Bake in greased jelly roll pan (cookie sheet) for 20 minutes at 350 degrees. Remove cake from oven and sprinkle chocolate chips (see below) evenly over cake. Let stand about one minute- don't spread. Pour frosting evenly over all. Enjoy!

For the Frosting:
1 stick butter
4 Tbs. cocoa
6 Tbs. milk
1 lb. box powdered sugar
1 tsp. vanilla
1 bag chocolate chips (use 1/2 milk or 1/2 semi-sweet, or 1 whole bag of each)

Melt all ingredients, except sugar and vanilla and barely bring to boil. Shut off heat and add sugar and vanilla. Consistency should be to pour, not spread over chocolate chips.

Shortbread Bloody Witch Finger Cookies


To watch this video recipe click HERE!

Makes 2 dozens.
Ingredients:

3 cups all purpose flour
1 cup powdered sugar
1 1/2 tablespoons vanilla extract
3 sticks unsalted butter, soften
1/2 teaspoon salt
Bakers semi sweet baking chocolate squares (4), melted (for the nails)
Almonds (for nails optional)
Strawberry preserves or marmalade for garnish

Combine flour and salt, mix well and set aside

In an electric mixer,cream the butter at medium speed, blend until smooth and creamy,
scrape down the sides if you need to. Reduce the speed and slowly add the powdered sugar
blend until well combined. Add the vanilla extract, continue to blend for 1 more minute.

Reduce the speed to the lowest and slowly add in the flour. Blend until all the ingredients come together. Do not over mix.

Refrigerate for 30 minutes to 1 hour.

Preheat the oven to 350ºF


Grab about 1 tablespoon of the dough and roll it with your hands to form a finger shaped cookie. If you are using almonds as finger nails, press down the almond into one end of the cookie.

 If you are making the nails with the same dough, form the nail using a toothpick.

Make the nails big and chunky, they are witch fingers, they don't have to be pretty at all.


Fingers are not straight, to give the impression of knuckles, squeeze the cookie bellow the nail, and squeeze again near the end. For a more finger-like appearance make some marks onto the cookie below the finger nail and near the end.


Bake at 350ºF for about 15-18 minutes or until slightly golden brown.

Let the cookies cool a little bit.

Melt the chocolate squares. (instructions are in the back of the package)


Using a small knife, cover the finger nails with the melted chocolate. Repeat this step until done.


Dip the end of cookie in the strawberry marmalade for a bloody presentation.

Stablilized Whipped Cream

A couple of weeks ago, I made a chocolate pie for company. I wanted to include a whipped cream border that I could apply before my guests arrived and would hold until I was ready to serve my pie. I knew better. I really did. I knew that piped whipped cream would be all weepy and deflated by the time I went to cut that pie. And it did. It looked horrible.

But I knew there had to be a way. I mean, really, look at all those diners that have pies with beautiful whipped edges. Therefore, when I was taking a pie to another dinner last Saturday, I was determined to figure it out. Enter stabilized whipped cream, the answer to all my prayers.

By the way it is made, stabilized whipped cream is sort of like a mousse. You whip the cream and add gelatin for stability. It then holds its shape beautifully in the refrigerator for hours and hours. While the end texture is not quite the same as freshly whipped cream, it is still delicious and its beauty and convenience make it a winning choice!

Stabilized Whipped Cream
Yield: approx. 2 cups

1 tsp unflavored gelatin
4 tsp cool water
1 cup heavy whipping cream
1/4 cup powdered sugar

Mix the gelatin and water in a small microwave safe bowl. When the gelatin is soft, after a few minutes, place the bowl in the microwave and heat gently at ten second intervals until the mixture is melted and warm, but not hot. Mix the cold whipping cream and powdered sugar together in a glass or metal bowl. Mix on low speed until the sugar is incorporated, then increase to high speed.

When the cream reaches soft peaks, slowly add half the gelatin mixture (you will discard the remainder). Continue whipping until stiff peaks develop. Pipe onto your dessert and keep refrigerated until serving. If you want to make a double batch, double the cream and sugar, but simply use all the gelatin mixture.

NOTE: I mix twice the gelatin mixture needed for the single batch because it is easier to measure and because with such a small amount, so much ends up sticking to the inside of the bowl. Feel free to add any additional flavorings to your whipped cream as usual, such as vanilla, chocolate, lemon or lime zest, etc.

Friday, October 21, 2011

Chili Blanco

Pic courtesy of Google Images

We had a pot luck luncheon in my ward a couple weeks ago and one of the dishes there was this chili. The girl that made it said that her aunt makes it and wins all sorts of cook-offs with it. So, I asked for the recipe and gave it a whirl last night. And, it did not disappoint. It was so yummy and I loved the change up from regular, old tortilla soup. Just FYI, I had to change the recipe up a bit b/c she used dry beans and cooked it over the stove, but it still came out just as scrumptious!

Chili Blanco
adapted from Laura Shelley

3 cans Great Northern Beans
1 onion, diced
1 24-oz can chicken broth
2-3 small chicken breasts (I used frozen. If you use thawed ones, be sure to add more chicken broth)
1 (7 oz.) can chopped green chilies
4 cloves of garlic, minced
2 T dried oregano
3 tsp. ground cumin
1 tsp. cayenne pepper
1 cup sour cream
2 cups shredded Monterey Jack Cheese

Put all ingredients in crockpot , except for the sour cream and cheese. Cook on low for 6 hours or high for 4 hours. Add cheese and stir until all incorporated. Serve with chips, if desired. (You don't need to garnish with any more cheese or sour cream as there's already plenty!)


Wednesday, October 19, 2011

Spooky Mini Pizzas

To watch this Video Recipe click HERE!!
I got this idea from a magazine picture. however I didn't read the magazine, so I don't know what kind of ingredients/products to make this. I'm just recreating the picture I saw. I'm using ingredients I already have in my pantry-refrigerator.

Ingredients:

1 package Pillsbury refrigerated Grands Biscuits (You can use pizza dough if you prefer son)
1 Jar Prego Italian Sausage and Garlic Pasta Sauce
String Cheese (I used cheese slices cut in very thin strips)
2 tablespoons olive oil
1/2 teaspoon Italian seasoning
1/2 teaspoon garlic powder
Black olives for garnish

Preheat oven to 400ºF

Combine the olive oil with the Italian seasoning and garlic powder, mix well, and set aside.

Flatten up the biscuits,press them down with your hands, a plate or a rolling pin.
Once all the biscuits are flat, brush them with the garlic oil.
Using a fork, poke each circle to prevent them from rising. Bake at 400°F for 5 minutes just to brown them a little bit.

If they do end up rising in the oven, just press them down with a plate.

Spoon the tomato sauce over each circle. Add as much or as little as you want.

Slice the black olives in half to make the eyes. Place the eyes wherever you want them to be. Add the cheese bellow and above the eyes. Add as much cheese as you like.

And that's it, bake at 400 for 8-10 minutes or until the cheese has melted.
*********
Another great alternative for this tomato and cheese mini pizzas is a "Mollete". A Mollete is a Spanish, (also Mexican) appetizer made with a garlicky bread topped with beans and cheese. Very simple and delicious.

Ingredients:

Pillsbury refrigerated Grands Biscuits
Seasoned oil (the one with made with the olive oil, garlic and Italian seasoning)
Shredded cheese (any kind)
1 can black beans
1 teaspoon salt
1 teaspoon dry oregano
1 teaspoon garlic powder
1/2 teaspoon ground cumin
1 tablespoon of olive oil
String cheese for garnish
Black olives for garnish

Season the beans with the salt, garlic powder, dry oregano and ground cumin. Add in the Olive oil and blend until smooth. (add water if needed)

Flatten up the biscuits, just like we did for the mini pizzas, brush them with the season olive oil and poke each circle with a fork. Sprinkle with cheese and bake at 400ºF for 5 minutes. Just to brown a little bit.

Spoon the bean mixture over the melted cheese and garnish with string cheese, place the cheese in a spider web design. Top the web with a whole black olive. Slice a second olive into strips to make the spider legs and that's it, bake for 10 minutes or until the beans are warm and the cheese has melted. Drizzle or brush with a tiny bit of extra virgin olive oil. Enjoy!

Tuesday, October 18, 2011

Homemade Taco Seasoning

pic courtesy of allrecipes.com

Mmmmm. My taco seasoning was expired and I was craving tacos tonight. So, I got on allrecipes.com and searched for the highest rated homemade taco seasoning, mixed it up, and crossed my fingers. And, wow- let me tell you- I will never buy another packet of taco seasoning! The flavors were so much more defined and intense. I loved it and so did my family.

Homemade Taco Seasoning
from allrecipes.com
  • 1 tablespoon chili powder
  • 1/4 teaspoon garlic powder
  • 1/4 teaspoon onion powder
  • 1/4 teaspoon crushed red pepper flakes (I subbed cayenne pepper to bring down the heat)
  • 1/4 teaspoon dried oregano
  • 1/2 teaspoon paprika
  • 1 1/2 teaspoons ground cumin
  • 1 teaspoon sea salt
  • 1 teaspoon black pepper
  1. In a small bowl, mix together chili powder, garlic powder, onion powder, red pepper flakes, oregano, paprika, cumin, salt and pepper. Store in an airtight container.
  2. Mix with approx. 2 pounds of meat, beans, or whatever your heart desires.

Brazilian Lemonade

Photo courtesy of Our Best Bites


My friend Andrea made this for us and it tastes so good!  The recipe sounds add--adding a whole lime into the blender--but trust me, this is so good and unique!  Tastes just like the drink from Tucano's!


Brazilian Lemonade
Recipe from Our Best Bites blog
4 juicy limes (try and find ones with thin, smooth skins; they’re the juiciest and the thin skin cuts down on the chance of your drink being bitter)
1 c. sugar
6 c. cold water
6 Tbsp. sweetened condensed milk
Mix cold water and sugar very well and chill until ready to use. This step can be done ahead of time.
Wash limes thoroughly with soap (I just use hand-dishwashing soap or regular hand soap); you need the soap to get the wax and pesticides off of the limes because you’re using the WHOLE lime, baby. Cut the ends off the limes and then cut each lime into 8ths.
Place 1/2 of the limes in your blender.
Add 1/2 of the sugar water, place the lid on your blender, and pulse 5 times. Place a fine-mesh strainer over a pitcher (the one you’ll serve the lemonade in) and pour the blended mixture through the strainer and into the pitcher. Use a spoon to press the rest of the liquid into the pitcher. Dump the pulp and stuff in the strainer into the trash. Repeat with remaining limes and sugar water. Add sweetened condensed milk; DO NOT leave this step out unless you will die of a horrible sweetened condensed milk allergy because this is the secret ingredient! You may want to taste test it at this point; I used giant, thick-skinned limes tonight and didn’t test it and it came out a little bitter. If it’s bitter, just add some more sugar and maybe a little more milk.
Serve immediately over lots of ice. This does not keep well, so don’t make this in advance (although you can cut the limes, mix the sugar water, and measure the sweetened condensed milk in advance). Serves 4, although I can pretty much guarantee you that people will want more; I usually plan on 1 1/2 servings at LEAST per person.

Monday, October 17, 2011

Chicken Fajitas

To Watch this Video Recipe please click HERE!

Hi Everyone! I hope you are all doing great!

Today's recipe is another Mexican Dish! I know two in a row? Well, I am Mexican after all and I love Mexican food! Anyway, today's recipe is Chicken Fajitas!


Ingredients:

4 large chicken breasts
1 white onion
1 red onion
1 red bell pepper
1 yellow bell pepper
1 orange bell pepper
2 jalapeño peppers
2 limes
1 lemon
1/3 cup fresh cilantro
3 garlic cloves
3 tablespoons extra virgin olive oil
1 tablespoon salt
1 tablespoon dry oregano
1 tablespoon ground black pepper
1/4 tablespoon ground cumin
flour or corn tortillas
1-2 avocados for garnish (1 is enough for 2 persons)
lime wedges for garnish
more cilantro for garnish

Mince the garlic place in a big plastic bowl (big enough to marinate the chicken)
Slice 1 jalapeno pepper (lengthwise), remove the seeds and mince 1 half of the pepper, combine in the same bowl with the mince garlic.

Slice the rest of the jalapeno in thin strips, also slice the second jalapeno, place in another large container.

Finely chopped the cilantro and mix it in the same bowl with the minced garlic and jalapeno, cut the lime and lemon in half, and add the juices to the garlic mixture, also add in 3 tablespoons of olive oil. Season with 1/2 tablespoon of each salt, ground black pepper and dry oregano also add a 1/4 of a tablespoon of ground cumin. Stir all together, give it a taste, add more seasoning if needed.

Slightly cut the chicken breasts, Do NOT cut all the way through, just cut enough so the marinate can get into the whole breasts, and not only on the surface.
(If you prefer, you can cut the chicken in thin strips, Fajitas are usually served on a tortilla, so to serve the fajitas we will eventually cut the breast in thin strips.)

Marinate the chicken in garlic mixture for about 30 minutes, longer if you have time. The flavors will only get better by the minute. The longer you marinate, the better it will taste.

Slice the rest of the ingredients. Cut the onions in half and then into 1/4 inch slices.
Also slice the bell peppers, lengthwise, remove the seeds and veins, and slice into 1/4 inch slices.

Combine all the vegetable in a large bowl, and marinate with the juice of 1 lime plus 1 1/2 tablespoons of extra virgin olive oil, season with 1/2 tablespoon of each: Salt, ground black pepper and dry oregano. Mix everything together and refrigerate until ready to use. (for aobut 15 minutes or until the chicken is ready to be cooked.)

Preheat the oven to 400ºF, 20 minutes before baking the fajitas.

This recipe is great for grilling so if you have a grill, grill the chicken for about 4-6 minutes on each side. Grill the vegetable until they become somewhat tender.

I'm going to be baking my chicken at 400°F for about 15 or until the chicken is cooked.
Bake the peppers for about 12-15 minutes.

Let the chicken rest for about 5 minutes before you slice it. Heat up the tortillas and you are ready to eat! You can serve with corn tortillas or flour tortillas, serve with avocado, garnish with fresh cilantro and lime wedges.

If you prefer, you can serve the whole chicken breast over a bed of bell peppers and a side of white rice, garnish with avocado, lime wedges fresh cilantro.

And that's it! Enjoy!

Never Fail Pie Crust


Photo from recipesfromhome-online.com


Even I didn't fail at this so it must truly be "never fail".  It made me get all kinds of flutters inside to make a pie crust.  Makes me feel like one of those perfect mothers from the 1950's...until I started yelling at my kids and realized I am totally from the 2000's!

Never Fail Pie Crust
From: Andrea Tanner
1 cup shortening
2 ¾ cups flour
1 teaspoon salt
1 egg
5 tablespoons water
1 teaspoon white vinegar

Cut together shortening, flour and salt with a pastry cutter. In a separate bowl, beat together egg, water and vinegar. Add egg mixture to flour mixture and cut together.

Cheese and Veggie Twist

Dagmar's last...for a while. :) Enjoy!
Cheese and Veggie Twist
Dagmar Jewkes

2 large eggs
1/2 c. tomatoes
1/2 c. mushrooms
Shredded Cheese
1/4 c. green onions
Bacon, crumbled (optional)
2 cans reduced-fat crescent roll dough

Mix all ingredients except crescent dough. Season with salt and pepper. With the dough, separate all the triangles and fan them out in a ring, with the narrow sides on the inside of the ring, 1/2 overlapping, corners of the long side pointing out (so it looks like a sun or star). Spread mixture over the inner portion of the ring. Fold the outer tips over to the inside and push edges together. Cook at 375 degrees for about 20 minutes. Watch the dough so it doesn't burn- if necessary, cover dough with foil until inside of twist is thoroughly cooked.

Sunday, October 16, 2011

Tortellini with Tomato-Zucchini Sauce

Here's a great, easy pasta for your weekly rotation...thanks again, Dagmar!
Tortellini with Tomato-Zucchini Sauce
Dagmar Jewkes

1 lb. cheese tortellini or cheese ravioli (refrigerated section of grocery store)
1 lb. zucchini, cubed or shredded
Salt
1 jar garlic, mushroom, or cheese pasta sauce
Cheese for sprinkling (parmesan or mozzarella)

Boil the tortellini and zucchini together with a hint of salt until fully cooked (or al-dente). Drain and place in serving dish. Add your jar of pasta sauce, toss, and sprinkle with cheese, if desired.

Saturday, October 15, 2011

Mexican Meatloaf

I knew I'd forget to post Dagmar's recipes every day. :) Here goes another one...enjoy!
Mexican Meatloaf
Dagmar Jewkes

1 1/2 lb. ground turkey
2 c. salsa
1/2 can tomato sauce, or diced tomatoes
1 pack stuffing mix for turkey or chicken
2 large eggs

Mix all ingredients together. Divide into a 12-muffin baking pan and bake for 15 minutes at 375 degrees- or until cooked through. Top with cheese or tomato sauce, if desired.

Thursday, October 13, 2011

Green Enchiladas (Enchiladas Suizas)

To watch this video recipe please click HERE!

Hi everyone!
Today's recipe is one of my favorite Mexican dishes, Green Enchiladas or as we call them in Spanish "Enchiladas Suizas", which means Swiss Enchiladas, according to an article I read somewhere, Swiss immigrants in Mexico were the ones who came up with the idea of baking this dish to get the cheese to melt, creating a beautiful white bed of cheesy goodness over the enchiladas, that's why we call this dish Enchiladas Suizas.

Serves4-5
Makes 15
Ingredients:

For the green salsa:
1 lb. Tomatillos
4 jalapeno peppers (more or less if you want)
1/4 cup fresh cilantro
1/4 cup chopped onion
1 garlic clove
salt and ground black pepper to taste
1/2 tablespoon lemon juice
1 tablespoon extra virgin olive oil

For the Enchiladas:
2 (20oz) chicken breasts cooked and shredded=(2 1/2 cups of shredded chicken)
1 cup Mozzarella cheese, shredded
Corn Tortillas (3 per person)
Vegetable oil for frying
Green onions for garnish
Salsa Verde (ingredients above or if you prefer, buy your favorite brand)

Simmer the chicken in salted boiling water for about 15 minutes or until cooked.
(if you have any leftover chicken, feel free to use that instead.)

To make the salsa:
In a large skillet, heat up 1 tablespoon of olive oil and sauté the tomatillos, jalapeno peppers, onion and garlic for about 10 minutes or until the jalapenos and tomatillos have become tender. Cover the pan if you want to to speed up the cooking process.

Transfer everything to a blender, season with salt and ground black pepper to taste. Add in the fresh cilantro, 1/2 tablespoon of lemon juice and about 1/4 cup of water, blend everything until well blended and smooth.

In a sauce pan, heat up 1 tablespoon of vegetable oil, add in the salsa and bring to a boil. If the salsa is too thick,feel free to add more water. Check the seasoning and add more salt and pepper if needed. Bring to a boil. Let it cool a bit.

To make the enchiladas:
Heat up about 1/4 cup of vegetable oil, fry the tortillas, for about 10-15 seconds on each side, just to warm them up. Keep on frying the tortillas until you are done.

To build the enchiladas dip the fried tortillas in the Salsa verde, make sure the salsa is coating both sides of the tortilla. (this is supposed to be a quick dip, do not let the tortillas in the salsa for a long time, or they will become soggy.

Fill the tortilla with the chicken and roll into a taco. Keep on repeating these steps until you are done.

1.- Dip in the salsa
2.- Fill with the chicken
3.- Roll into a taco

Once you are done, spoon some of the green salsa over the enchiladas, sprinkle some of the shredded mozzarella cheese on top and bake for about 6-8 minutes at 400° or until the cheese is completely melted

If you prefer, you can microwave for about 40 seconds instead.

Serve with rice and a small salad, or with rice and beans. Drizzle with more salsa verde, garnish with more cheese and green onions.

 And that's it. Enjoy!

Broccoli Soup & Turkey Avocado Paninis


Broccoli Soup & Turkey Avocado Paninis
Dagmar Jewkes

For the Soup:
1 1/2 lbs. broccoli, cut into bite-sized pieces
6 bouillon cubes
1 quart water
2 cups milk
1/3 c. flour
1 to 1 1/2 cups shredded cheese

Cook the broccoli in the bouillon and water, stirring occassionally, until tender. Puree in blender with milk and flour (this will guarantee a smooth thickening of the soup). Put back in pan and cook slowly, until thickened. Add cheese until melted.

For the Paninis: (Makes 4 sandwiches)
4 slices of your favorite bread (or roll)
Mustard
Ranch dressing (light)
2 slices of cooked, crispy bacon
8-12 slices of turkey deli
1 avocado
Cheese

Spread a drop of ranch dressing and mustard on one side of bread. Cover with 1/2 slice of bacon. Add 2-3 slices of turkey, 4 thin slices of avocado (@1/4 avocado each), sprinkle cheese on top. Cook in oven at 375 degrees until desired browning occurs and cheese is melted.

Wednesday, October 12, 2011

Tomato and Avocado Salad

Thanks again to Dagmar for this one...sounds delicious!
Tomato and Avocado Salad
Dagmar Jewkes

3 tomatoes
1 large avocado
Bunch of cilantro
Garlic Salt
Lemon Juice
Green Onions or Regular diced onions (optional)

Dice vegetables and toss with seasonings to taste. Enjoy!

Tuesday, October 11, 2011

Spinach and Potato Cakes


To watch this video recipe please click HERE!

Hi Everyone!
Today's recipe is another meatless dish! Spinach and Potato Cakes, super easy and delicious! They are great as an appetizer, side dish or even a main dish. Perfect for lunch or dinner! I hope you like it!


Ingredients:

1 lb. red potatoes (or any other potato)
10 oz.frozen spinach
1/2 cup shredded cheese (you can add up to 1 cup for richer cheesy texture)
1 garlic clove
1 tablespoon fresh rosemary
1 tablespoon fresh baby dill
salt and ground black pepper to taste
1 teaspoon ground cumin
1 teaspoon garlic powder
2 tablespoon extra virgin olive oil
1/4 cup yellow cornmeal
1/4 cup milk (or 1/3 cup heavy cream for creamier texture)

Preheat the oven to 400°F

Cut the potatoes in big chunks. Simmer the potatoes in salted boiling water for about 10 minutes or until the potatoes are completely cooked. Add the garlic clove to the boiling water. Once the potatoes are cooked, drain them and put them back
in the same pan, also keep the garlic. Mash the potatoes and garlic together.

Season the potatoes with salt and ground black pepper to taste, and about 1 teaspoon of each ground cumin and garlic powder. Taste for flavor and add more salt, pepper, garlic and cumin if needed. If you want to add some heat to this dish, feel free to add a dash of
Tabasco sauce or Shirasha Japanese hot sauce. Also mix in the fresh rosemary and baby dill.

Stir everything together, and add the rest of the ingredients: corn meal, cheese and also add in the milk a little at a time. Continue to stir and add the rest of the milk plus 2 tablespoon of extra virgin olive oil or if you prefer you can replace the olive oil with 3 tablespoons of melted butter, for rich buttery flavor.

The potato mixture shouldn't be too wet, or to dry, we want the consistency of somewhat dry mash potatoes, if you feel it is too dry, add a little more milk or heavy creamy and if you feel it is too wet feel free to add more cheese or some extra corn meal. (cheese is better)

Drain the spinach, give it a big squeeze to remove as much of the liquid as you can.  Stir spinach and potato mixture together, taste for flavor and add more seasoning if needed.

For easy cleaning don't forget to line your baking sheet with foil and spray it with cooking spray to prevent the cakes from sticking to it. Make your cakes or patties as big or as small as you want.

Bake them at 400°F for about 12-15 minutes or until golden brown

These cakes are perfect as an appetizer, a side dish or even a main dish.
I served mine on a bed of baby greens and tomato wedges. You can serve these with rice or pasta, to dress them up a little bit, drizzle with tomato sauce, gravy, Ragu or any other pasta sauce.

Doritos Chicken

Another Dagmar original...enjoy!
Doritos Chicken
Dagmar Jewkes

1-2 lbs. of chicken breasts, flattened
1 bag Doritos, crushed
Light Mayo (enough to dip the chicken in)
Salt, Pepper, Seasoned Salt, Garlic Salt (to liking)
Oil

Put the dry Doritos and mayo in separate bowls. Dip the chicken breasts in mayo and then season with desired seasonings. Dip chicken in Doritos and then press the chips into the chicken so they will stick. Lightly fry the chicken in a skillet until cooked through. Serve with salad or veggies.

Monday, October 10, 2011

Peanut Chicken

This is Dagmar's recipe...she sent me several to post so I'm going to do one each day (if I remember!). She's such a great cook and can throw things together on a whim, so I'm sure these recipes will be keepers. Here's the first one...
Peanut Chicken
Dagmar Jewkes

1/2 cup soy sauce
1/2-1 cup water
Some lemon juice
2-3 Tbs. peanut butter
1 1/2 lbs. chicken, diced
Cooked rice
Broccoli

Let all ingredients (except rice and broccoli) marinate for 1 1/2 hours. Then cook in skillet until chicken is cooked entirely through. Serve with rice and broccoli.

Sunday, October 9, 2011

Lemon Biscotti

I just love these little cookies. They're lemony and have a nice bite. They have a different texture than a lot of cookies. They're not crispy in the same way a lot of cookies are, but then again, they also have half the calories and a third of the fat content of your typical cookie (like chocolate chip or snickerdoodle).

Traditionally, biscotti do not have any fat in them. No butter, no shortening, no oil. However, I found those cookies to have a somewhat less than satisfying texture, so I started experimenting. What I came up with is a nice in between, I think. There's enough butter in them to have a nice flavor and a little bit of snap, but not so much as to be overwhelming. I think you'll really like them. I sure do.

While these twice baked little snacks involve a little more effort than a normal cookie, they're still pretty straight forward. And they are so darn cute!

You start by mixing together all of the cookie ingredients. I use my stand mixer, but the dough is soft enough, you could probably mix them fairly easily by hand. Turn the dough out onto the counter and roll into a log. Divide the dough in half and shape each half into a eight to ten inch long roll. Press each log flat.

These will rise a bit, so you want to start them off fairly thin. Shoot for about a half inch thickness.

Bake the cookies in a 350° F oven for about 40 minutes. Be sure the cookies have started to brown before pulling them out. If you pull them out before they brown a little, the inside often has an undercooked flavor that won't go away even after the second baking.

Remove from the oven and carefully transfer them to a cooling rack. Reduce the heat in the oven to 325° F. Carefully slice the loaves across at half inch intervals using a serrated blade. You should end up with 13-15 slices plus two small ends. I eat the ends at this point. It's the cook's prerogative.


Place an oven safe rack in the cookie sheet and lay the slices wide side down; spread them out as much as possible. Bake for 10 minutes. Flip the cookies over and bake another 10 minutes. Let them cool completely before icing.

Mix together the icing ingredients until they are smooth. Use enough milk to obtain a consistency that allows the icing to pour easily. Place in a flat bottomed dish that allows you to easily dip the bottom of the biscotti into the icing.

Let the excess icing drip off and then lay them upside down on a cookie sheet to dry. Allow at least an hour for drying.

These biscotti keep well in a plastic bag or other air tight container for at least a week. They are very attractive if wrapped in small bags and given as gifts.


Lemon Biscotti
Yield: 25-30 biscotti

3 cups flour
1 cup sugar
2 tsp baking powder
1 1/2 tsp lemon zest
2 TBS fresh lemon juice
1/2 cup butter, softened
3 eggs

For the icing:
1 1/2 cup powdered sugar
1 TBS fresh lemon juice
1/2 tsp lemon zest
2-4 TBS milk

Preheat the oven to 350° F. Mix the flour, sugar, baking powder, and lemon zest together. Add the lemon juice, eggs, and butter and beat until well mixed. Turn out on a counter and form into a log about one foot long. Divide into two logs. Shape each log until they are about 8-10 inches long. Press until they are each about one half inch thick. Place onto a parchment lined baking sheet. Bake until they start to turn golden, about 40 minutes. Cool for 10 minutes on a wire rack.
Reduce the oven temperature to 325° F. Using a serrated knife, slice into half inch wide cookies. Place the wire rack onto the cookie sheet and lay the slices, wide side down, on the rack, spread out as much as possible. Bake for 10 minutes, flip, and then for ten minutes more. Cool completely before icing.

Mix the icing ingredients together. Use enough milk to make a fairly thin icing; the icing should pour easily. Place in a flat bottom dish or bowl and dip the bottom of each biscotti into the icing. Let drain slightly and then place upside down on a baking sheet to dry. Let dry at least one hour. Store in an air tight container up to one week.